“Dots of Denim” Simplistic, Stunning Baby Afghan and Hat
“Dots of Denim” Simplistic, Stunning Baby Afghan and Hat is quick and easy to make. It makes a great beginner blanket.
After having made two different afghans from Hobby Lobby’s I Love This Yarn Marled Denim and Silver Mist, I did not anticipate using it again. But you never know when inspiration will strike! However, Daisy Farm Crafts Modern Moss Stitch Blanket pattern inspired me to use it once again.
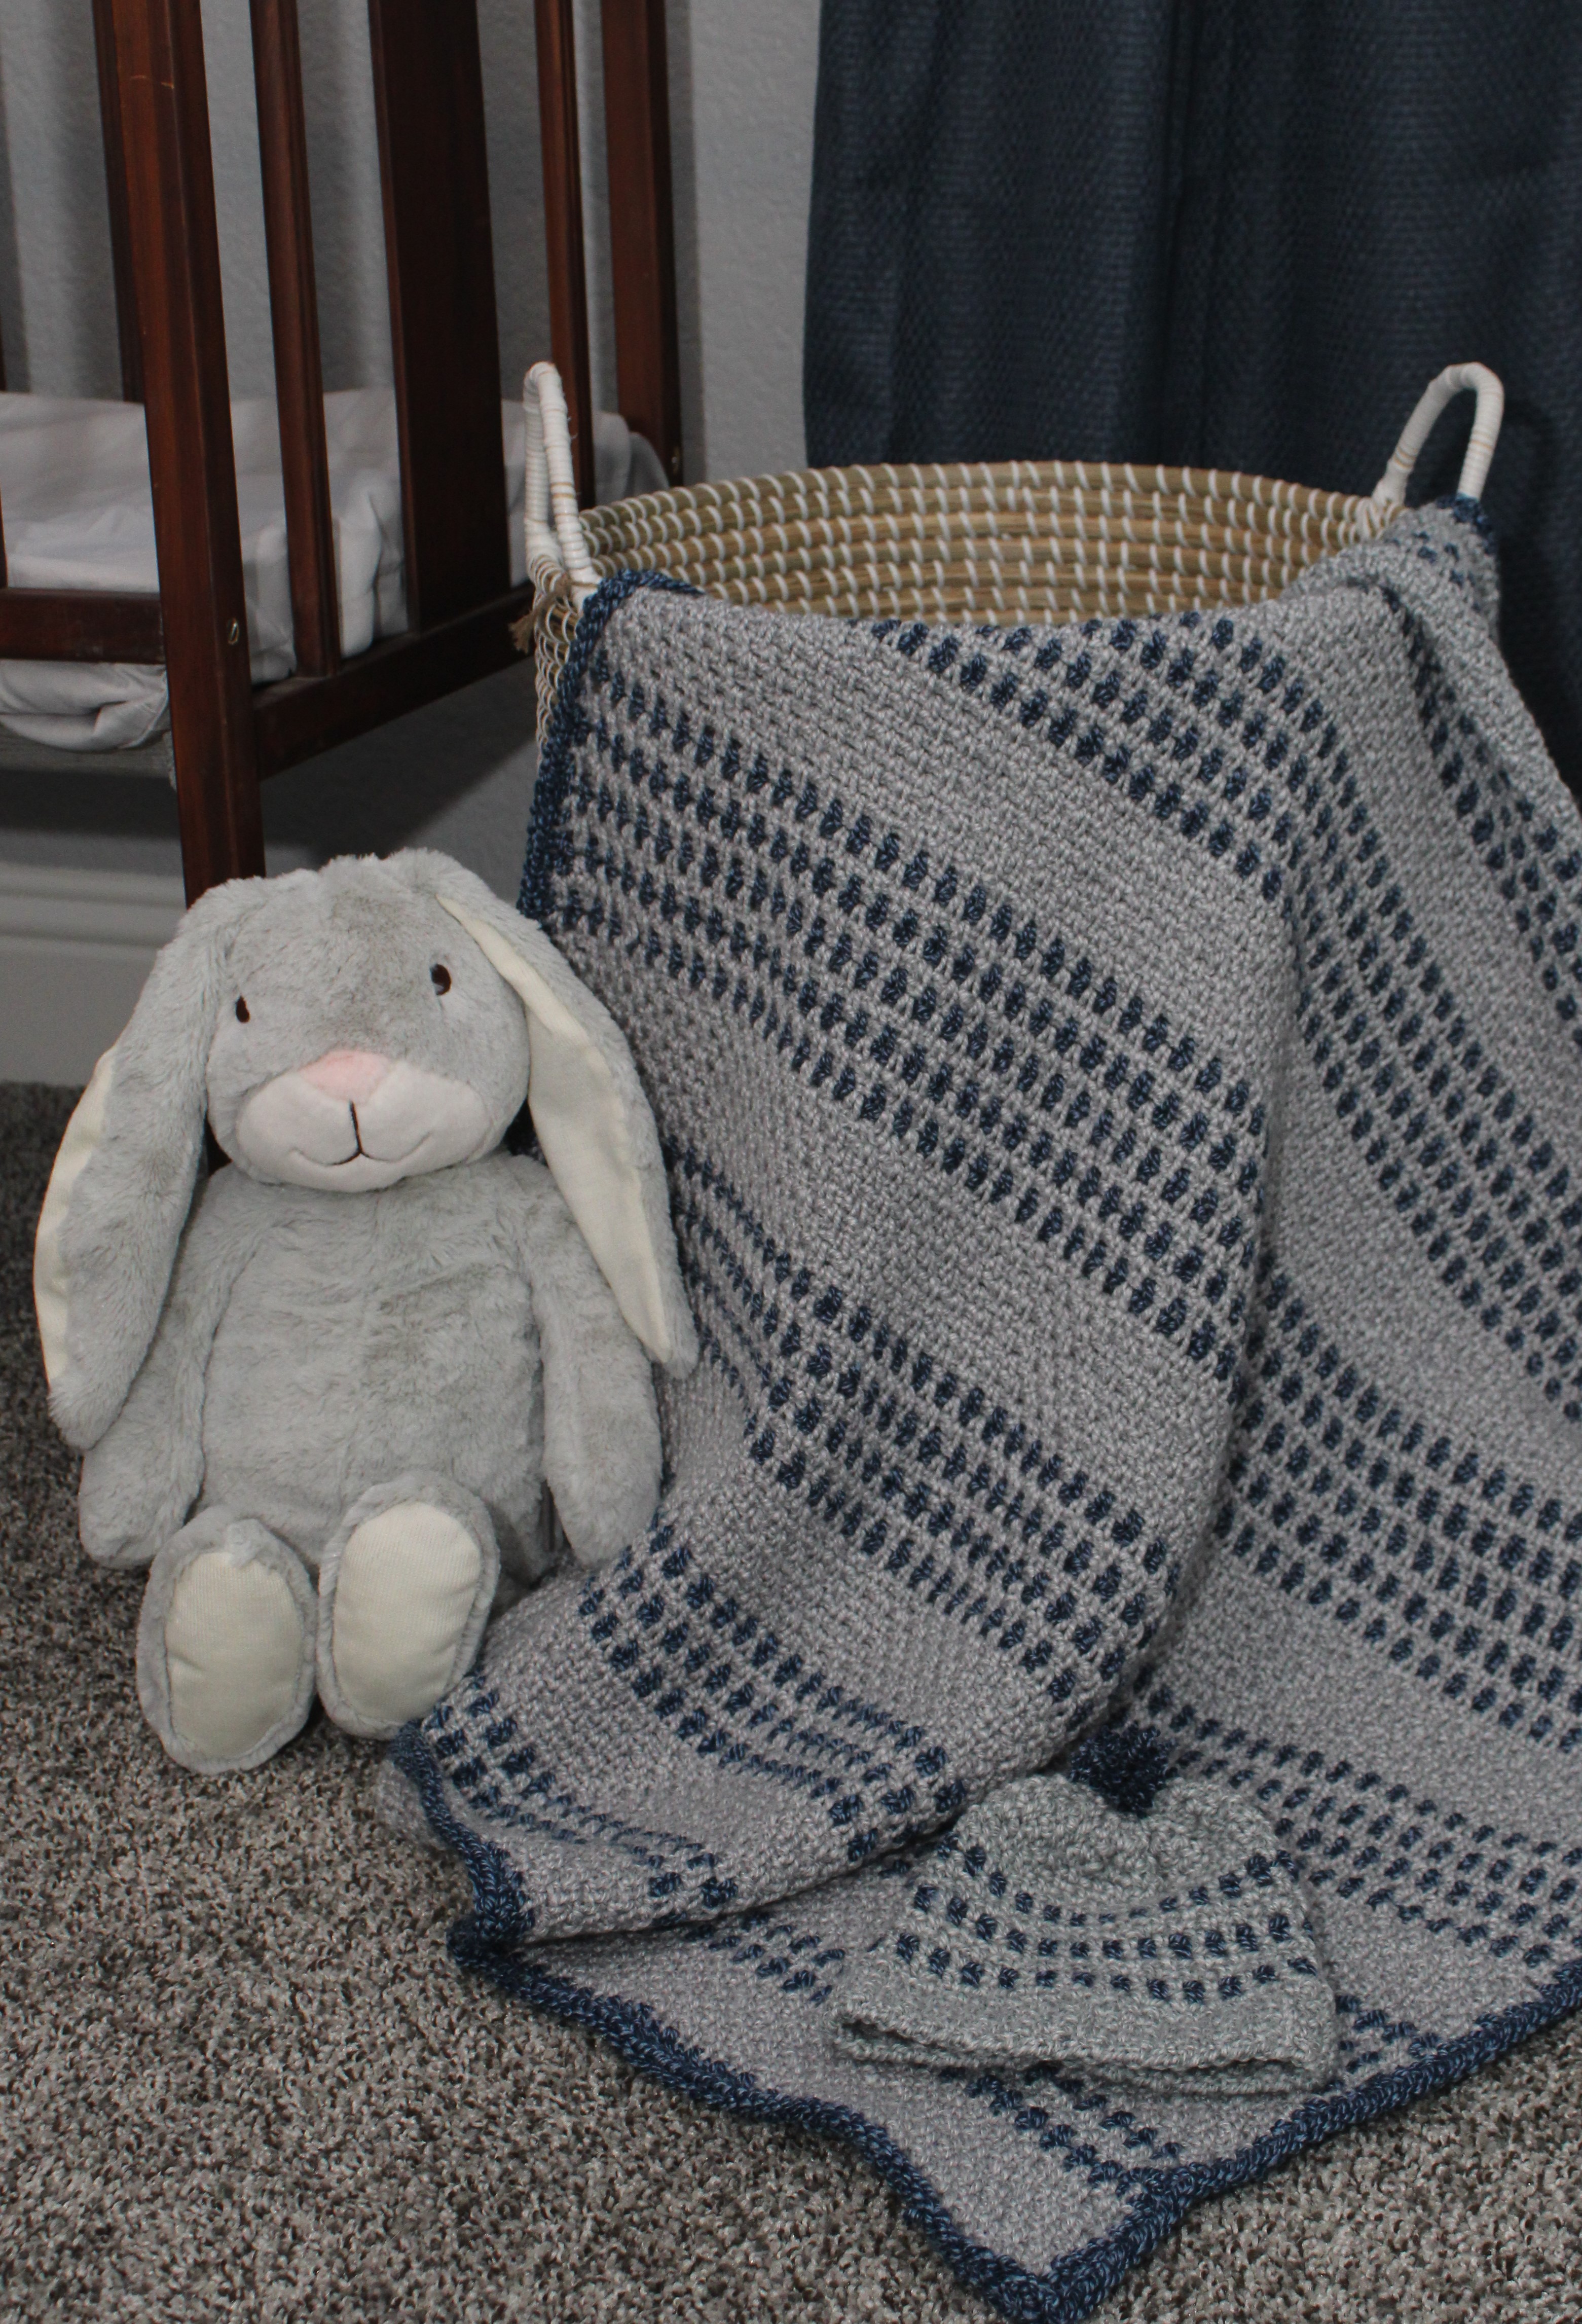
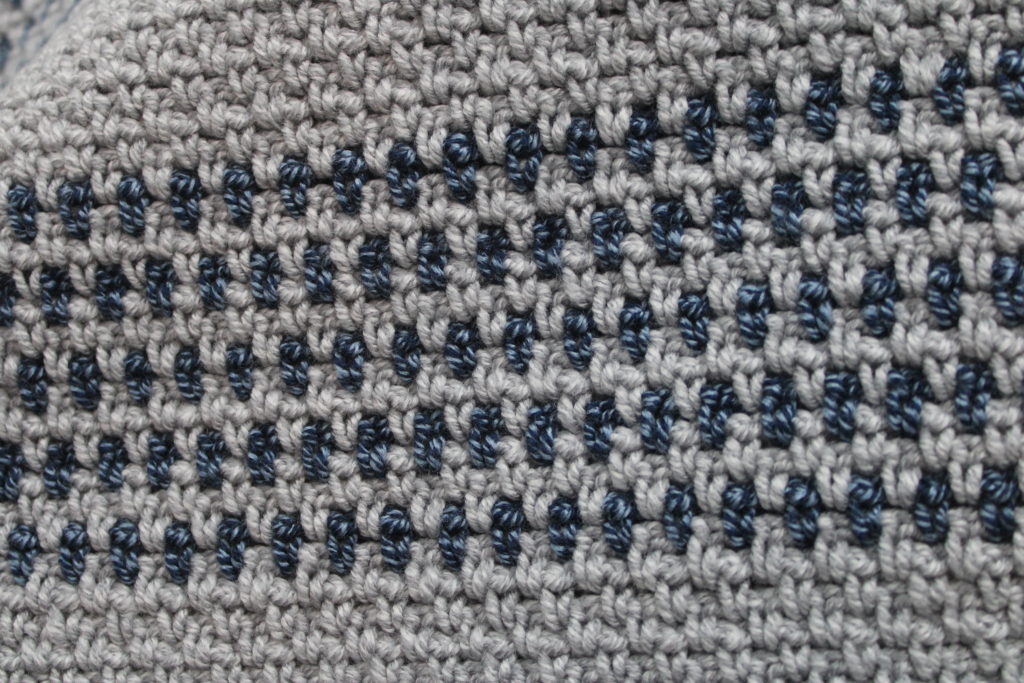
After seeing the post about the Modern Moss Stitch blanket, I immediately knew that the Silver Mist and Marled Denim would be a great combination for that pattern. I ran out to my local Hobby Lobby and grabbed some more yarn. I tweaked the pattern to suit the style and size of blanket I was wanting to create. As I was using the moss stitch with the Silver mist and Marled denim, I fell in love with the dot look. I quickly settled on calling this blanket “Dots of Denim”.
Inspiration Takes Shape!
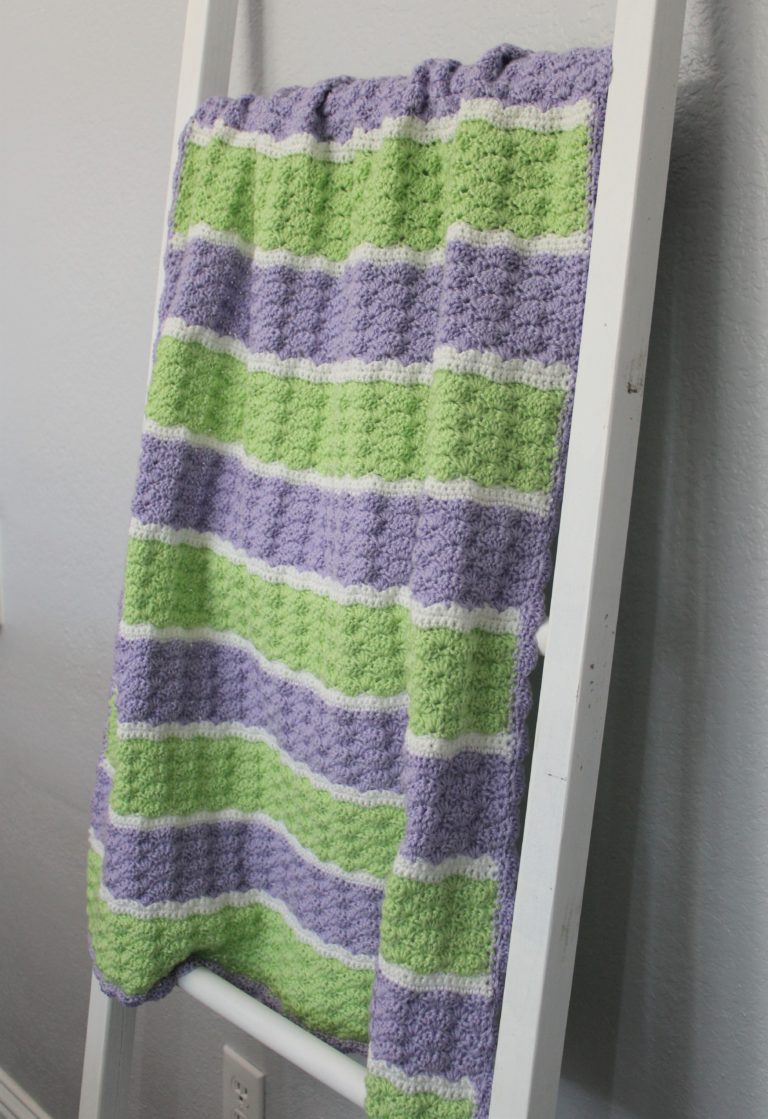
While playing with the pattern and yarn, I decided to make a modern baby blanket. I knew right away that to get the dot look, the denim would only be one row. But, I wanted to play with the number of rows to use in between with the grey. Also I was wanting to have more rows of the blue dots, but not wanting to just do an alternating color pattern.
I chose to start with alternating the rows of denim between 3 rows of grey. Working in sets of 2 rows of denim like the inspirational blanket was my first thought. However, I decided to increase the number of rows of denim with each set. With each set, I added another row of denim until I reached 5 rows of denim.
Reversing the Color Pattern
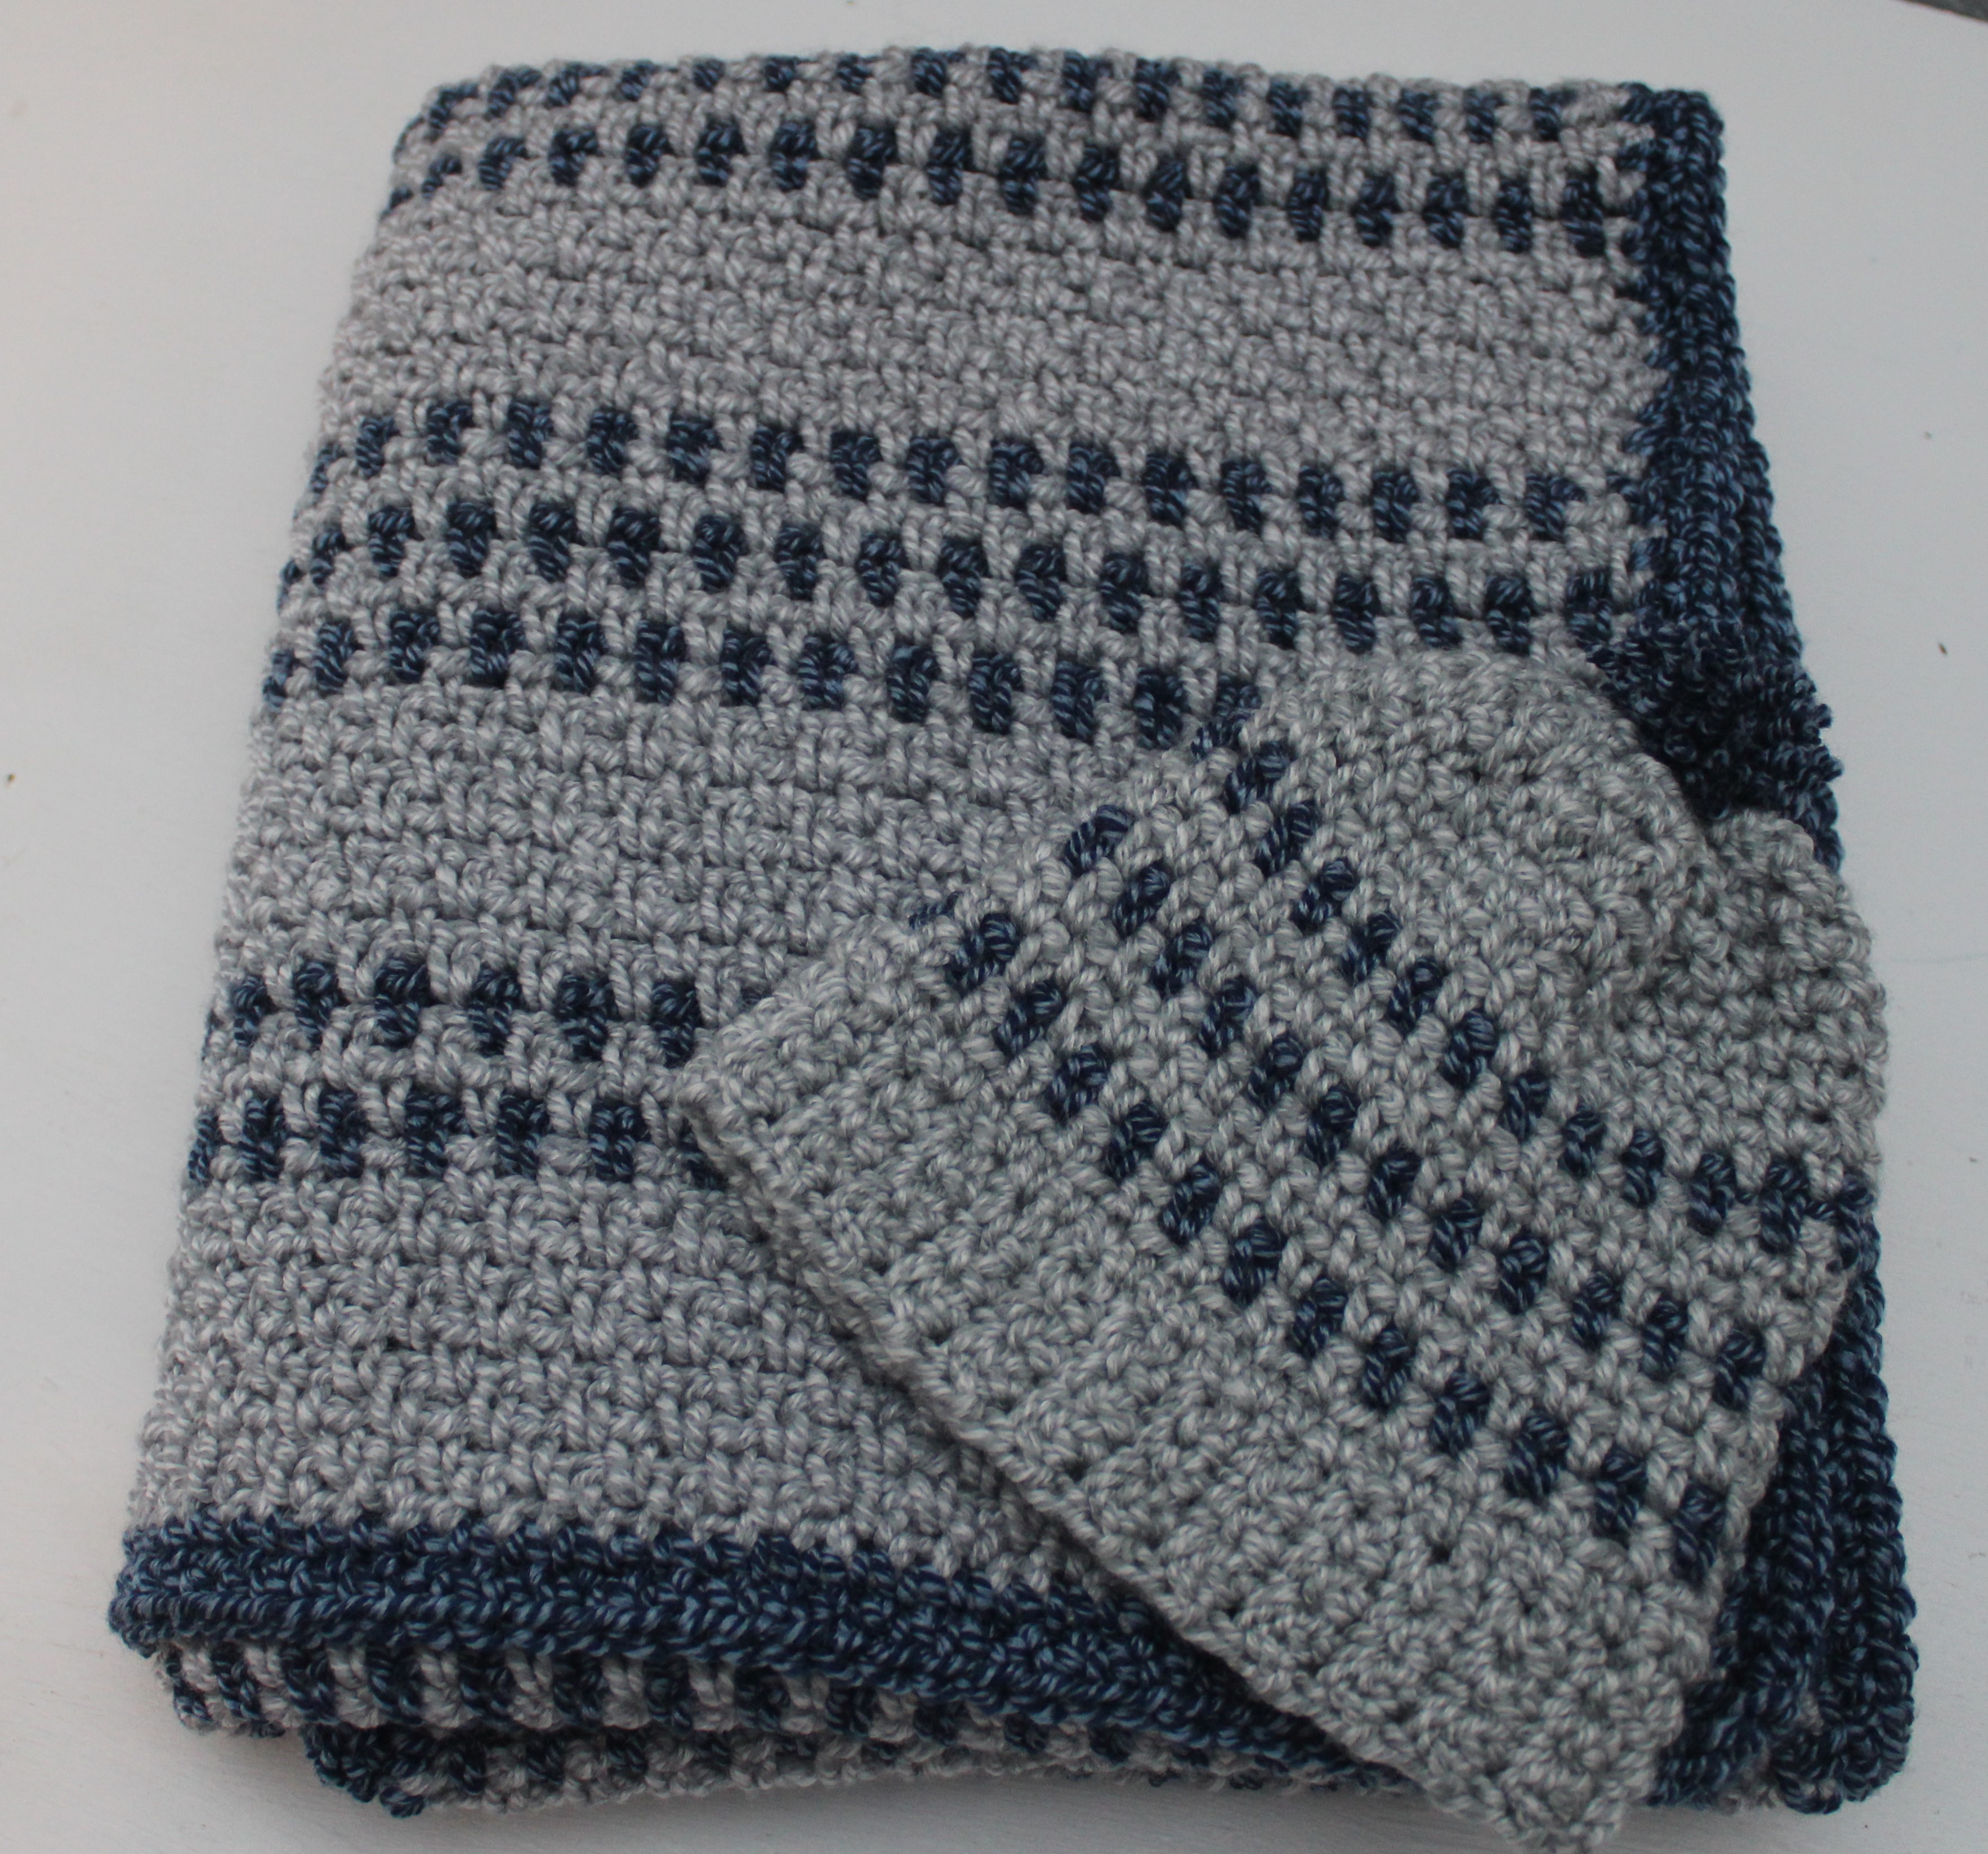
From there, I chose to work the color pattern backwards. To give the blanket a completed look, I crocheted 2 rows of single crochets around the edges with the denim. The gave the blanket a clean, finished edge.
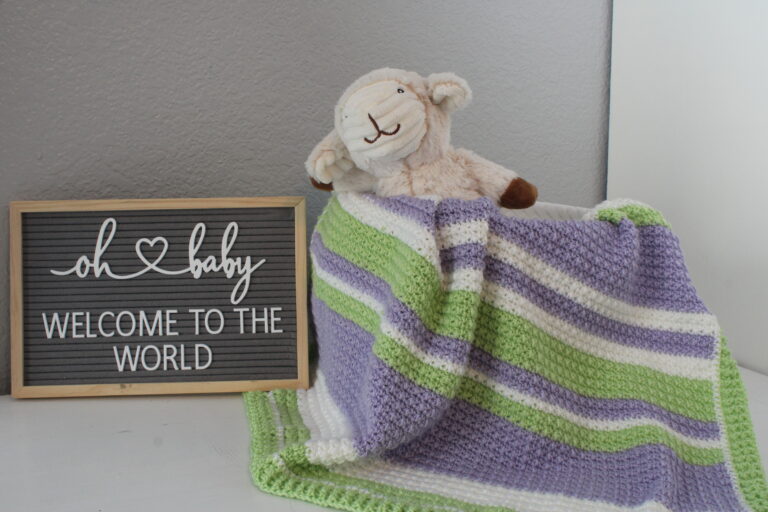
A Hat Too!
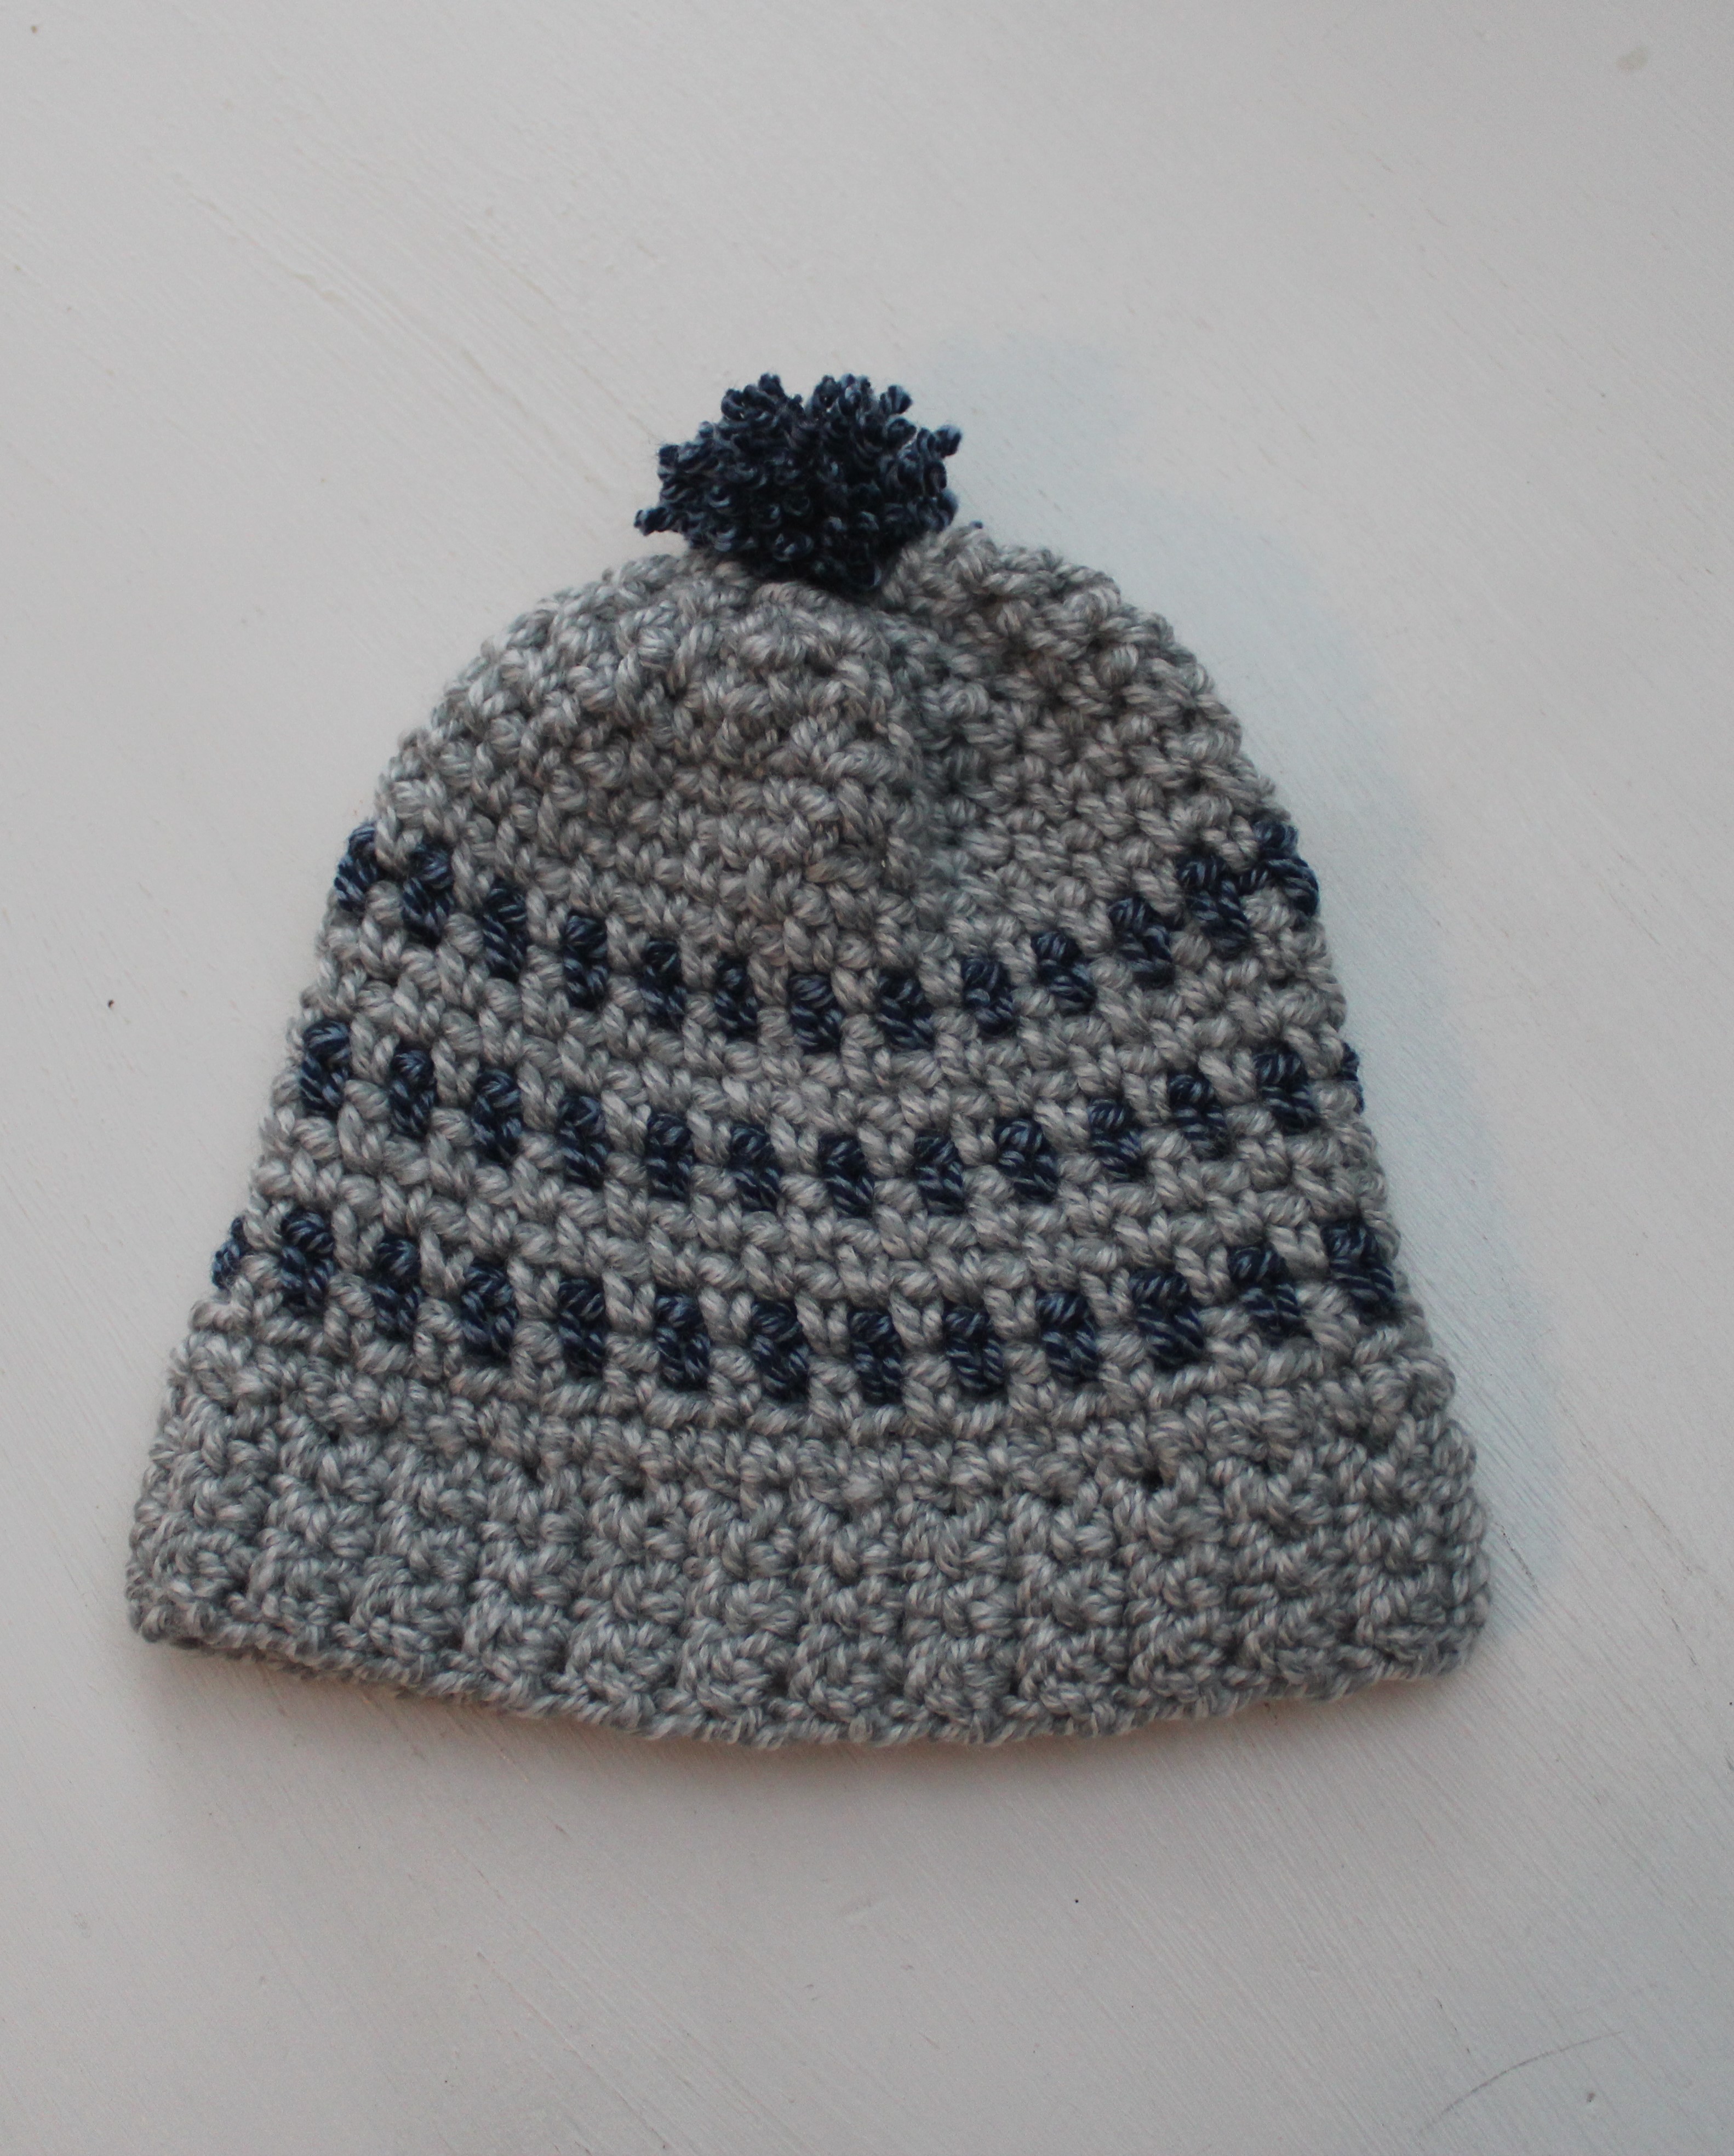
To complete the look, I had enough yarn left over for a small Dots of Denim hat. I used the same moss stitch to make the hat, alternating the rows of grey and denim. This gave the same dotted look to the hat. To finish off the hat, a denim pompom was added to the top.
Project Complete!
The Modern Moss stitch look turned out great! Who knows, since I seem to love this Denim Marled yarn so much, maybe I will make this one again! It made such a cute little set for new baby boy!
As always, you can purchase an ad free PDF version of this pattern here.

Dots of Denim Blanket
Materials:
- 3 skeins Silver Mist, I Love This Yarn by Hobby Lobby
- 1 Skein Marled Denim, I Love This Yarn by Hobby Lobby
- Weight 4
- Tapestry needle to weave in ends
- Scissors
- Hook Size J/6.0mm
- Gauge: 14 stitches and 14 rows equals 4″
- Finished size: 32″ X 35″
Stitches: Moss Stitch (Also called Linen Stitch)
- Ch
- Sc-Single Crochet
- Moss or Linen Stitch
Special Stitches:
- Moss Stitch (also known as Linen Stitch)
- (sc, ch 1, sc) into indicated stitch.
PATTERN NOTES
- The pattern is worked in rows.
- The beginning chain 2 counts as a ch-1 space and will have a sc worked into it at the end of each row.
With Silver Mist, ch 116 (or any even number of chains)
Row 1: turn, sc in the 4th ch from hook. *ch 1, sk 1 ch, 1 sc in next st* Rpt from * to * across to last 2 ch. Sk 1 ch, sc in last ch.,Ch 2 and turn.
Row 2: *sc in ch-1 space, ch 1* Rpt from * to * across working a sc into the last ch-1 space (it will be the top of the ch-2 turning stitches) Ch 2 and turn.
Repeat row 2 changing colors as directed in color pattern.
Color Pattern:
- 8 Silver Mist
- 1 Marled Denim
- 3 Silver Mist
- 1 Denim
- 8 Silver mist
- 1 denim
- 3 Silver Mist
- 1 Denim
- 3 Silver Mist
- 1 Denim
- 8 Silver mist
- 1 Denim
- 3 Silver Mist
- 1 Denim
- 3 Silver Mist
- 1 Denim
- 3 Silver Mist
- 1 Denim
- 8 SIlver mist
- 1 Denim
- 3 Silver Mist
- 1 Denim
- 3 Silver Mist
- 1 Denim
- 3 Silver Mist
- 1 Denim
- 3 Silver Mist
- 1 Denim
- 8 Silver Mist
- 1Denim
- 3 Silver Mist
- 1 denim
- 3 Silver Mist
- 1 Denim
- 3 Silver Mist
- 1 Denim
- 8 Silver Mist
- 1 denim
- 3 Silver Mist
- 1 Denim
- 3 Silver Mist
- 1 Denim
- 8 Silver Mist
- 1 Denim
- 3 Silver Mist
- 1 Denim
- 8 Silver Mist
Finish Off and weave in ends
BORDER
Dots of Denim Newborn Hat
Hat Brim
- With Silver Mist, Ch 6
- Row 1: Turn, HDC SL ST in 2nd st from hook and in each stitch across
- Row 2-50: Turn, Ch 1, HDC SL ST into same st. and each st across. (approx. 16″ long)
Fold Brim in half, careful not to twist. Sl st ends together. Turn right side out. Working all the next rows in the same direction with the RS facing.
Hat Body
- Row 1: Ch 1, work sc into the same st and the end of each row around, (50 sc)
- Row 2: Ch 2, sk 1 st, sc in next st. * ch 1, sk next st, sc in next st.* around. Sl st to the top of the ch-2. Change color to denim in last step of the sl st.
- Row 3: With denim, Ch 1, sc into first ch-2 space from the row below. *ch 1, sc in next ch-1 sp* across to first sc. Sl st and change to grey.
- Row 4-20: Rpt rows 2-3 changing colors as listed below.
- 1 row sc around
- 1row grey moss stitch
- 1 row denim moss stitch
- 3 rows grey moss stitch
- 1 row denim moss stitch
- 3 rows grey moss stitch
- 1 row denim moss stitch
- 9 rows grey
.Finish off, leaving a tail of about 10″. Turn inside out. Using tapestry needle weave the long tail through the top of last row made, gathering tightly as you go. Make a knot on the underside of the hat. Weave in ends.
Make a pompom leaving tails long enough to weave through top of the hat and tie tightly to the underside. Trim pompom as needed to make it look uniform all the way around.
Dots of Denim Simplistic Stunning Baby Afghan and hat was surprisingly easy to make. I hop that you enjoyed this pattern. Please be sure to check out more patterns with simple stitches in my patterns sections. Until next time, Thanks for stopping by DulceBella Designs! Sit, relax, stay awhile and keep creating crochet art!