
6 Essential Crochet Stitches That Every Beginner Needs to Know
Crochet is a fun and easy craft to learn. It doesn’t take a lot of tools and materials to do. And the best thing is, you only need to learn a few stitches to be able to start making projects or crafts. With these 6 essential stitches, the possibilities are endless. In this article, you will learn the 6 most common and basic crochet stitches, with written and video tutorials, helpful tips, and even have a few project ideas too!

These are the must-know stitches that are seen in almost every pattern. Best of all, they are super easy to learn. Once you know them, you will be able to follow a pattern with ease and start creating your very own designs.
If you’re ready to start your own crochet journey, you have come to the right place. This beginner’s guide will teach you these basic stitches and give you a great foundation for improving your skills.
the 6 essential crochet stitches
Firstly, let’s talk about the 6 essential crochet stitches that every beginner needs to know. And because they are easy to learn, and with a bit of practice, you will be making your own creations before you know it.
These basic stitches are the building blocks of crochet. After mastering these stitches, the possibilities of what you can make and design are endless. By following an easy pattern, you can create hats, scarves, potholders, ear warmers, and even blankets.
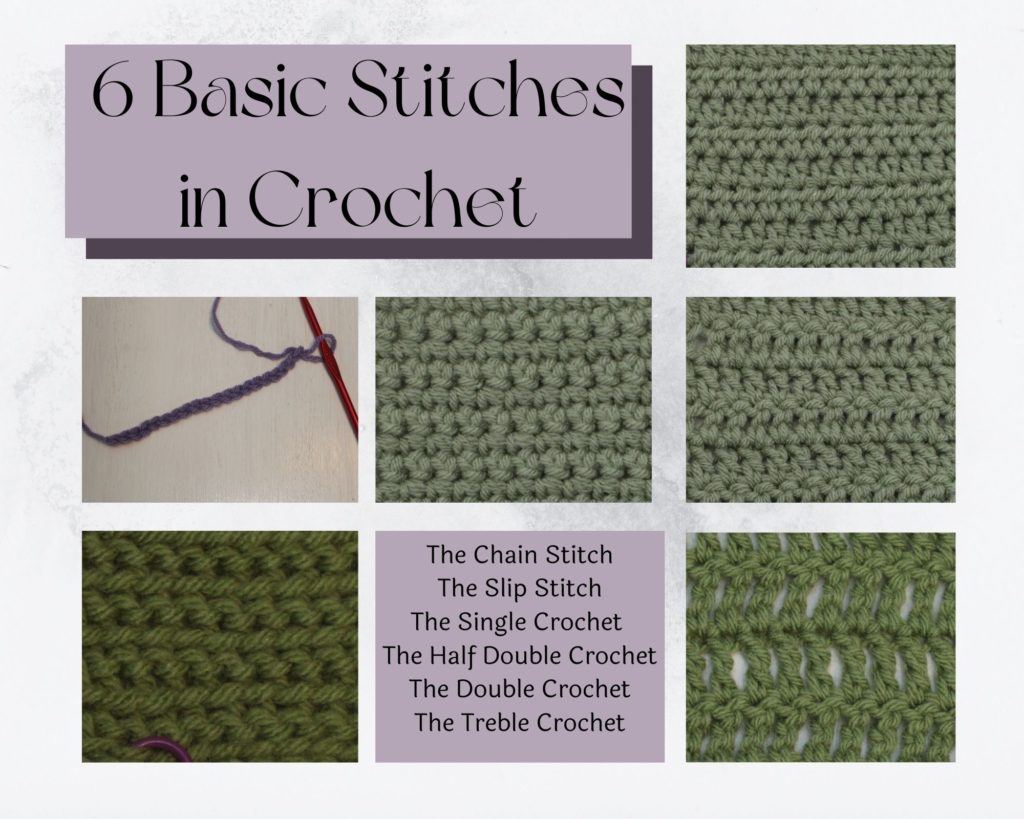
This beginners guide will teach you all you need to know about these 6 essential crochet stitches:
- Slip Knot and Chain Stitch
- Slip Stitch
- Single Crochet Stitch
- Half Double Crochet Stitch
- Double Crochet Stitch
- Treble Crochet Stitch
I will take you through each of these stitches with step by step written and picture tutorials as well as video tutorials. These tutorials are written in US crochet terms. Please understand there are differences between British and American crochet terms.
getting started
The first thing you will need to do is gather all the crochet materials you will need. It really is not that many and the materials you need are inexpensive.
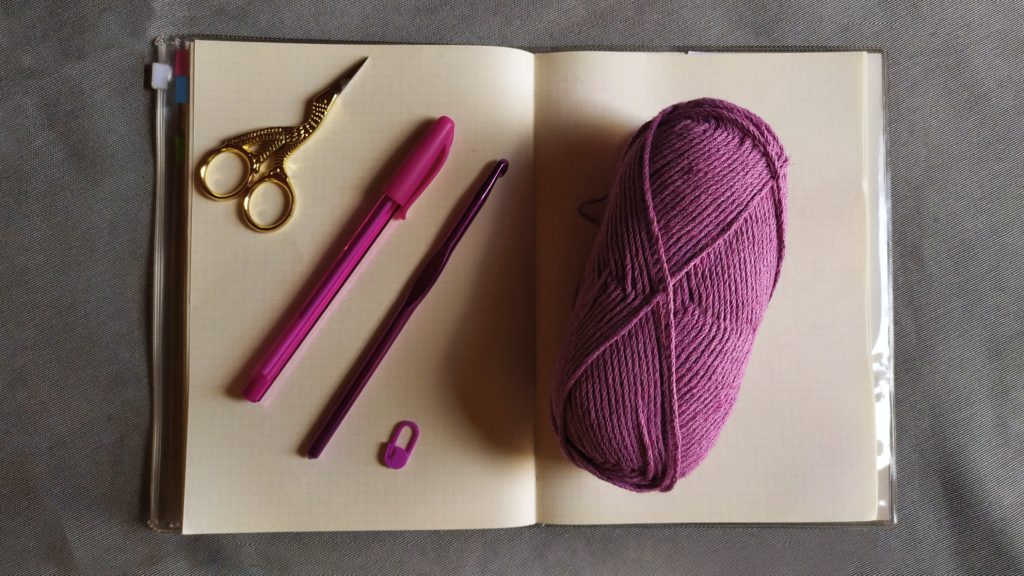
- yarn (lighter colors and smoother textures are best for beginners)
- crochet hook
- scissors
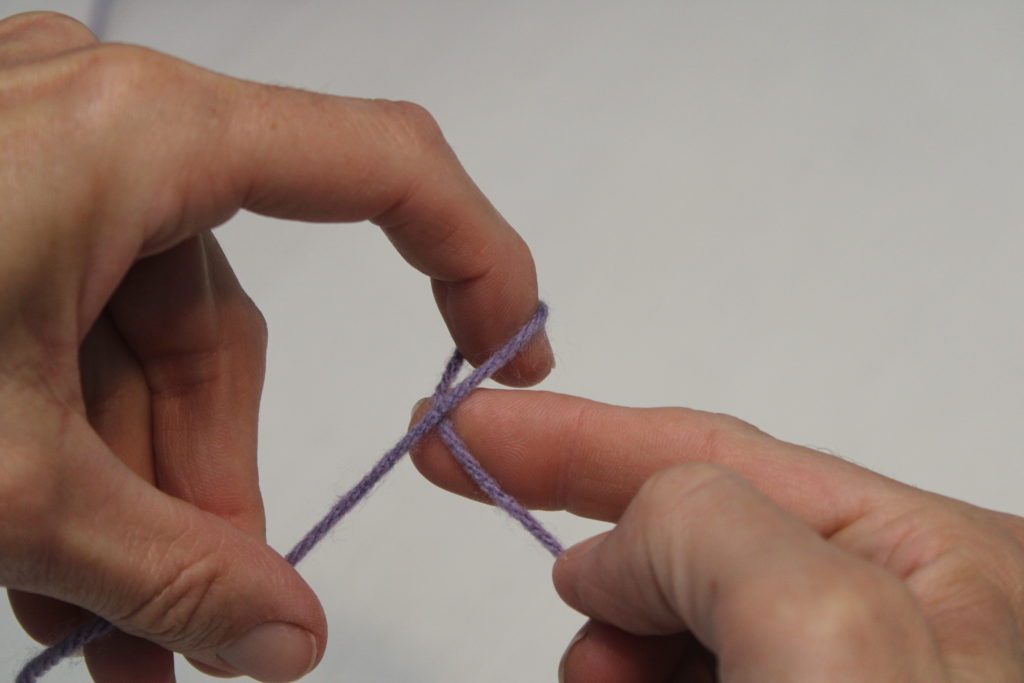
how to make a slip knot
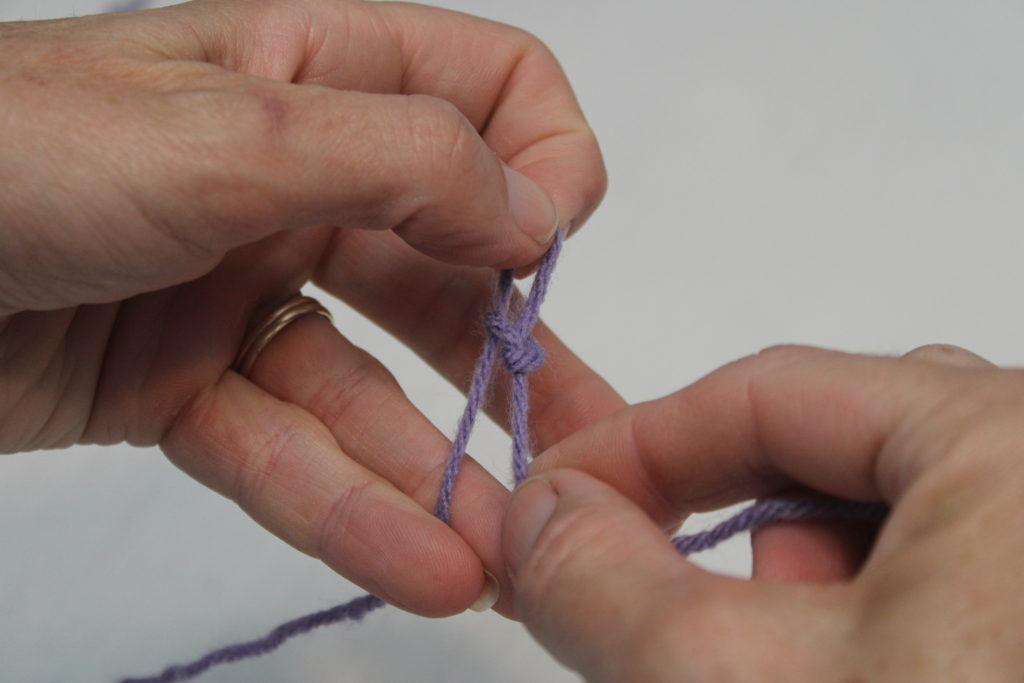
Before learning the chain stitch, we must learn the slip knot. The slip knot is used to secure the yarn on the hook before beginning the crochet chain stitch. To make a slip knot, leave a tail of several inches.
- Cross the working yarn( the yarn that leads to the ball of yarn) over the tail of the yarn.
- Insert the hook into the loop made and hook the working yarn with the hook.
- Draw the working yarn through the loop.
- Pull gently on both yarn ends to tighten the knot against the hook.
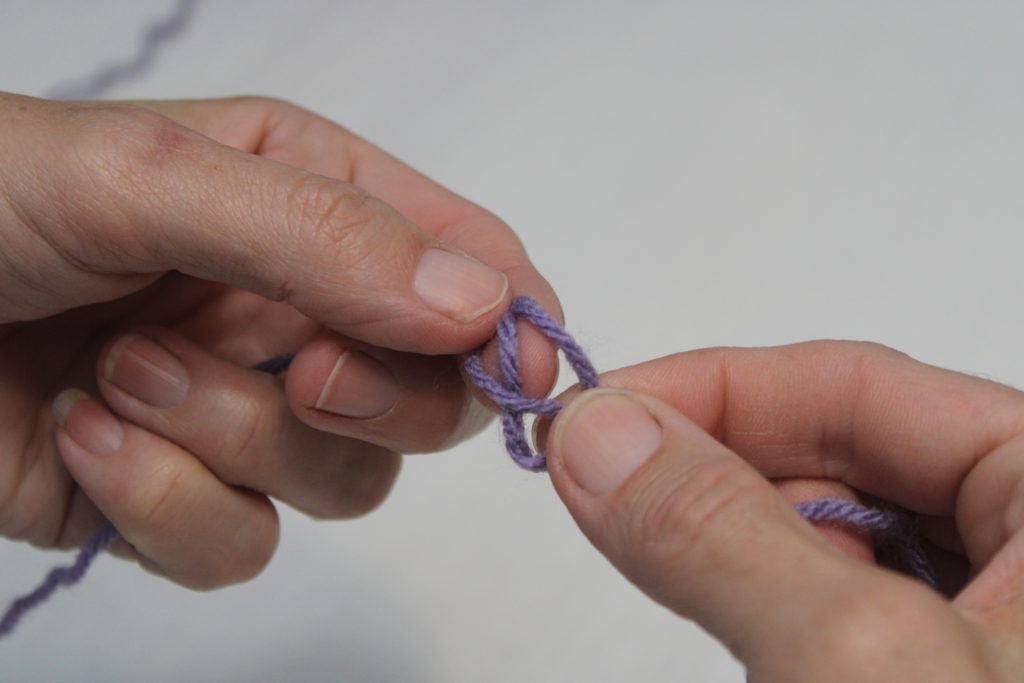
How to CROCHET CHAIN STITCH
Now that you have the slip knot, we can continue to the chain stitch. It is the very first of the 6 essential crochet stitches and a basic technique that all beginners need to learn. It is abbreviated “ch” in patterns. Most patterns begin with a designated number of chain stitches called the foundation chain.
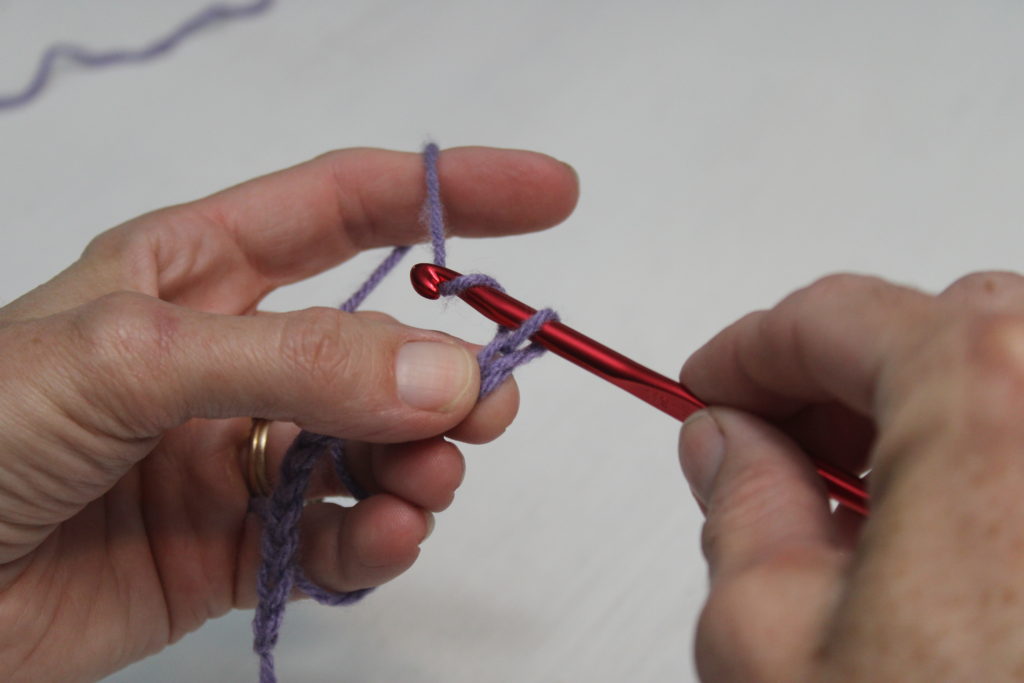
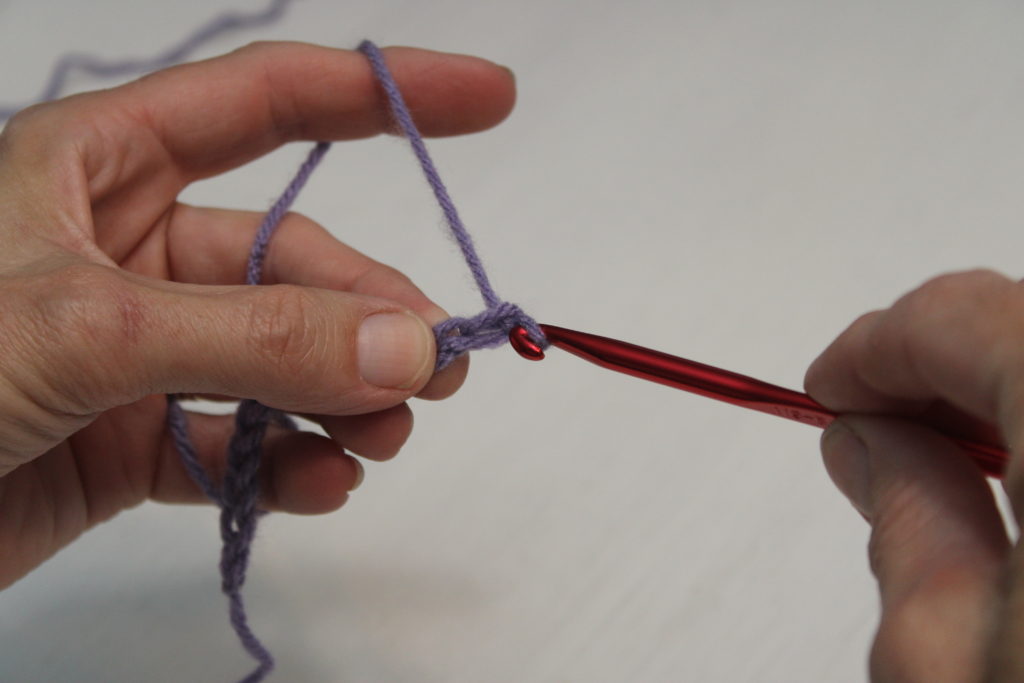
To make a chain stitch,
- Yarn over the hook and catch the working yarn.
- Pull the yarn through the loop on the hook.
You have made your first chain stitch. Continue pulling yarn through the loop on the hook until you have made the needed or desired number of chains.
Lots of projects are made out of just chain stitches. Yes, you read that right. Scarves, necklaces, and bracelets can be made from chain stitches.
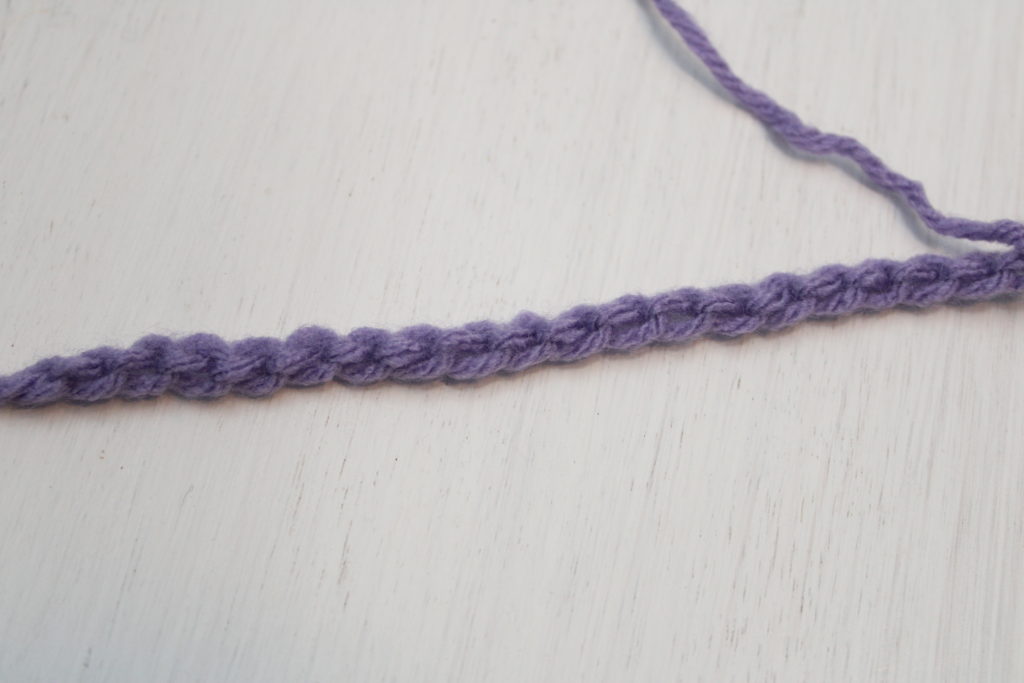
THE FOUNDATION CHAIN
Another technique for using the chain stitch is the foundation chain. Your crochet fabric grows from the foundation chain. Most importantly you need to have the correct number of chains required for the stitch pattern. This number is given at the beginning of the instructions and is given in multiples. For example, “chain multiple of 3 stitches + 1” means chain any number of chains that can be divided by three and then add one more chain.
The front of the foundation chain looks like a series of “V’s” or hearts. The back of the chain forms a distinctive bump of yarn behind each of those v’s. When counting chains, count each V-shaped loop on the front of the chain as one chain stitch. Do not count the loop on the hook or the slip knot
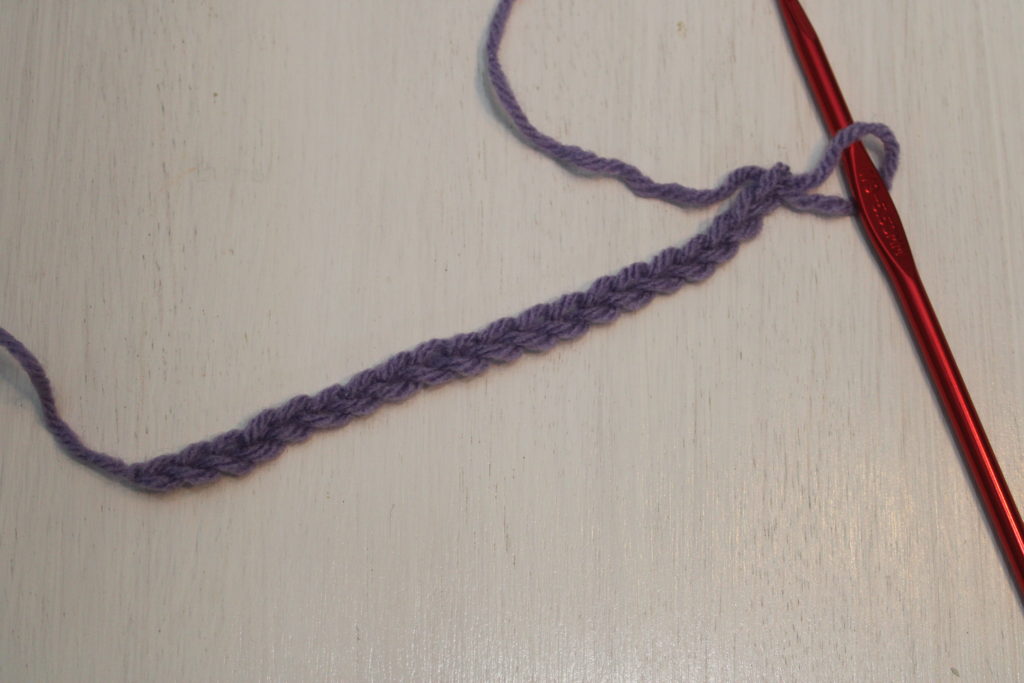
HOW TO MAKE A FOUNDATION CHAIN
- Yarn over the hook and catch the working yarn.
- Pull the yarn through the loop on the hook.
- Repeat to make the next chain stitch and the rest of the foundation chain.
Now that we have covered the slip knot and chain stitch, we can move on to the basic stitches you need to know. These are repeated in rows to make simple textured fabrics. To begin, work the first row into the foundation chain starting in the second, third, fourth, or fifth chain from the hook. The number of chains you skip before starting your first stitch of the first row is determined by the height of the stitch you are making. The skipped chains count for the first stitch of the the first row.
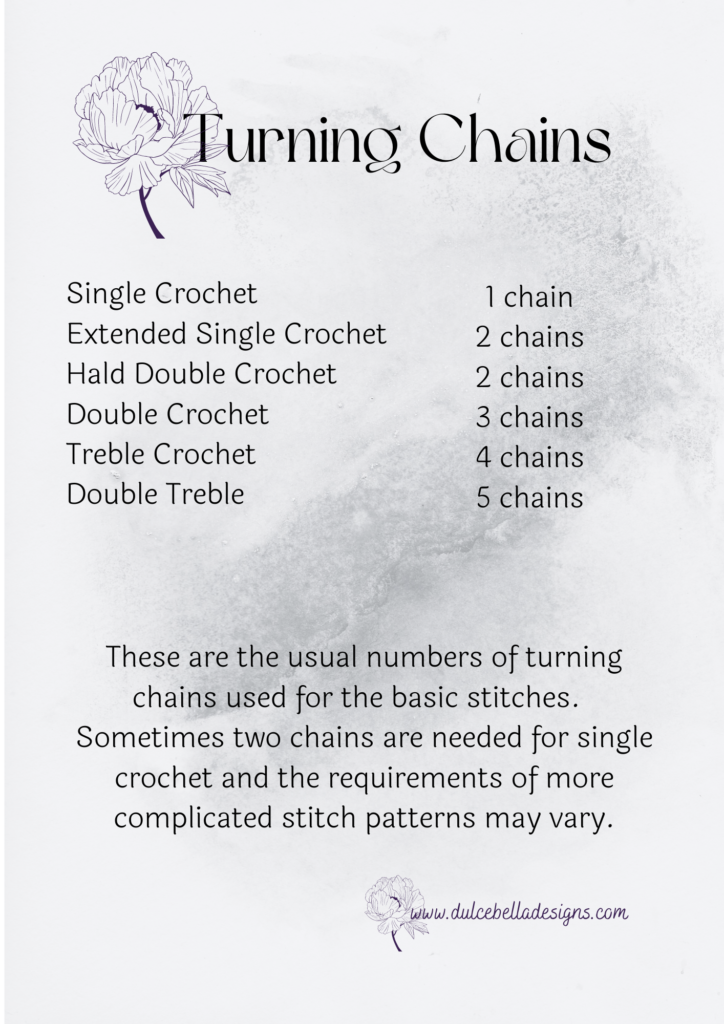
Every row following begins with the similar number of chains, called the turning chain. The chart above shows the number of turning chains needed for each of the basic stitches.
THE TURNING CHAIN
In addition to chains being used as foundation of your work, a turning chain is a group of chain stitches that begin the next row of a project. The height of the turning chain depends on the height of the stitches made in the row. For example, a row of single crochets will start with a turning chain of 1 chain stitch. A row of double crochet stitches would start with a turning chain of three chain stitches.
After finishing the first row, turn your work (unless otherwise instructed). To turn your work, turn it either clockwise or counter clockwise. It is often describes as “like turning the pages of a book”. Which ever way you turn your work, be constant, this will make a straighter edge.
After turning the work, chain the number of turning chains noted in the instructions. You are now ready to start the next row.
A CONNCECTING CHAIN
In another technique, crochet chains can connect stitches together within a row. In the Moss Stitch, for example, you single crochet in one stitch, then chain 1 before making the next single crochet. The “chain 1” separates the two single crochet stitches and creates a space in the row.
CHAIN STITCHES USED TO CREATE TEXTURE
Finally, different textures are created using the chain stitch. For example, the picot stitch, a common edging stitch, uses three chain stitches before crochet a single crochet in the next stitch. This creates a raised bump along the edge of a project.
the slip knot and chain stitch video tutorial
HOW TO Crochet Slip Stitch
Once you have mastered the chain stitch and foundation chain, you are ready to learn the slip stitch. It is the smallest in height of the basic stitches. It can be used to build rows of a project, but does not increase the height by much at all. Generally, you use this stitch as a connecting stitch. Often times you will see the slip stitch used at the end of a round to join the first and last stitches of a round. It closes the round and allows you to begin the next round. Another technique used with the slip stitch is surface crocheting, which adds decoration to crochet fabric.

To make the slip stitch, begin with any number of chains, and follow the steps below:
- Insert your hook into the 2nd chain from the hook,
- yarn over and pull a loop through the chain, or work, and through the look on your hook.
- You have made one slip stitch.
The slip stitch video tutorial
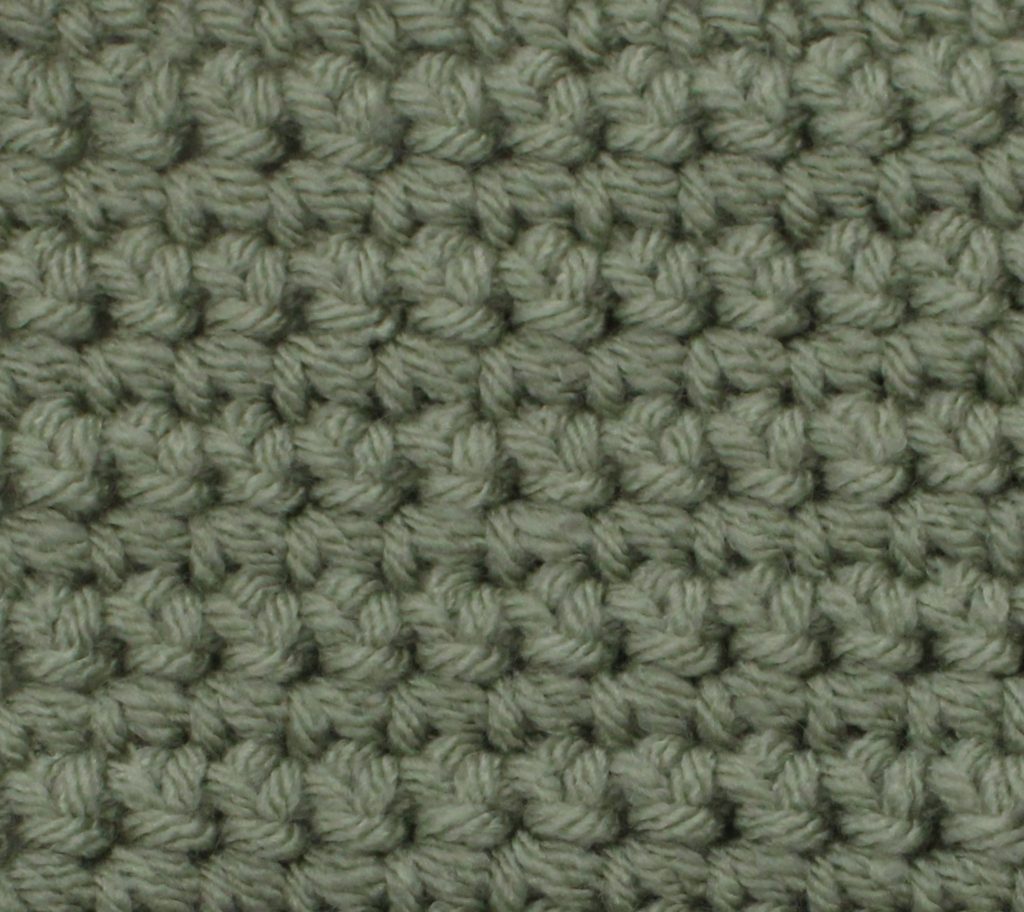
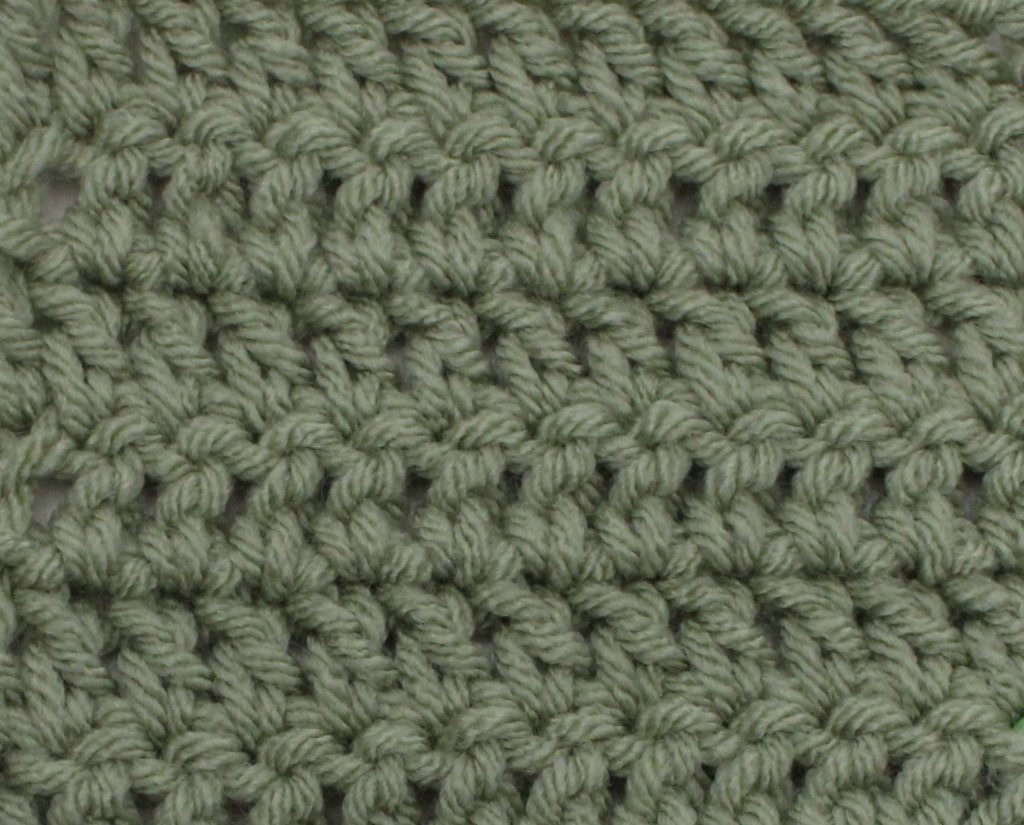
You can move across the chains in the same way by repeating step one and two. The slip stitch makes a very dense fabric because it is a small stitch. However, combine it with other stitches and you create unique textures, like with the Crunch Stitch.
How to make the Single Crochet Stitch
The single crochet (abbreviated SC) stitch is also a small stitch and also creates a dense fabric. Use this stitch by itself across the rows or in combination with other basic stitches to create unique textures and designs in the fabric. For instance, combine the single crochet with the half double crochet and you create the cloud stitch.
To make the single crochet stitch:
- Insert your hook into the second chain from the hook.
- Yarn over and pull a loop through the work or fabric.
- Yarn over again to catch or “hook” the working yarn, and pull through 2 loops on your hook.
- One single crochet stitch made.
Repeat these steps in each of the chains across the row to create a row of single crochets. Turn your work (again think about turning the pages of a book). Chain 1 for the turning chain, and you are ready to start row two. Once again, there are countless projects that you can make from the single crochet. Scarves, hats, coasters, mug rugs, and potholders just to name a few. So have fun creating some wonderful and unique projects.
the single crochet video tutorial
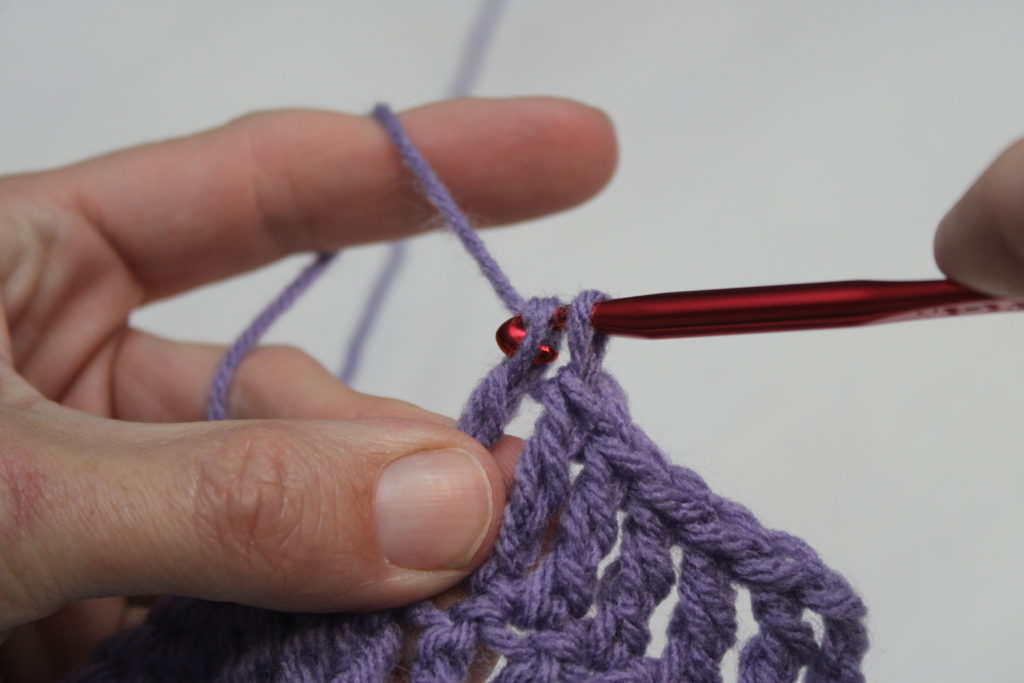
Half Double Crochet Stitch
The next tallest stitch, the Half double crochet stitch, (abbreviated HDC) is another of the basic stitches. This is great stitch to learn and is easy and quick to grow a semi-dense fabric. This is another stitch that is great for creating simple and fun projects like scarves, blankets, and even sweaters.
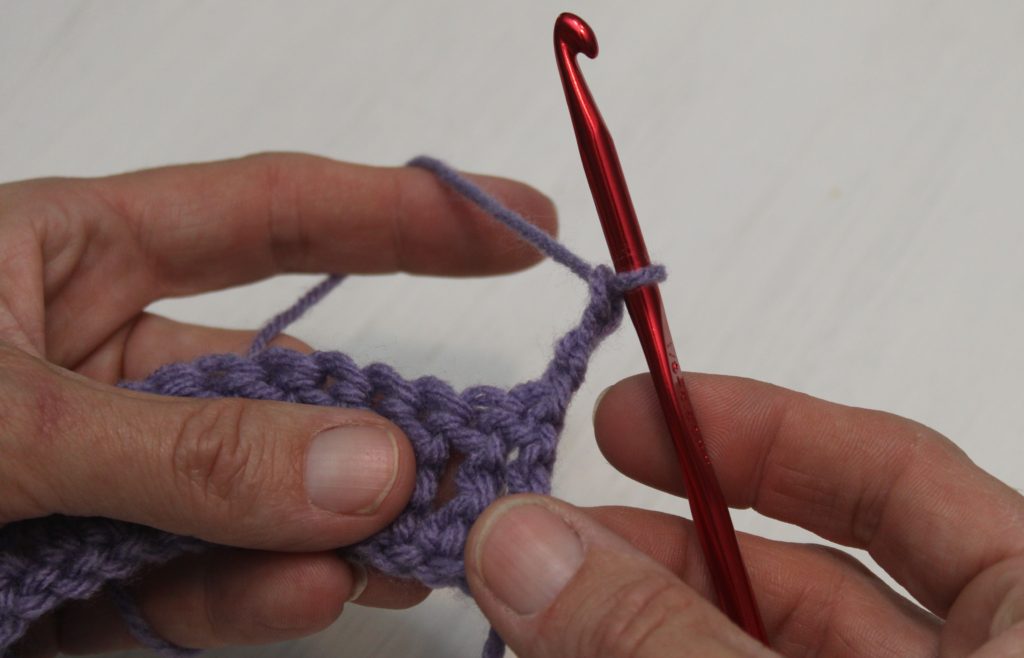
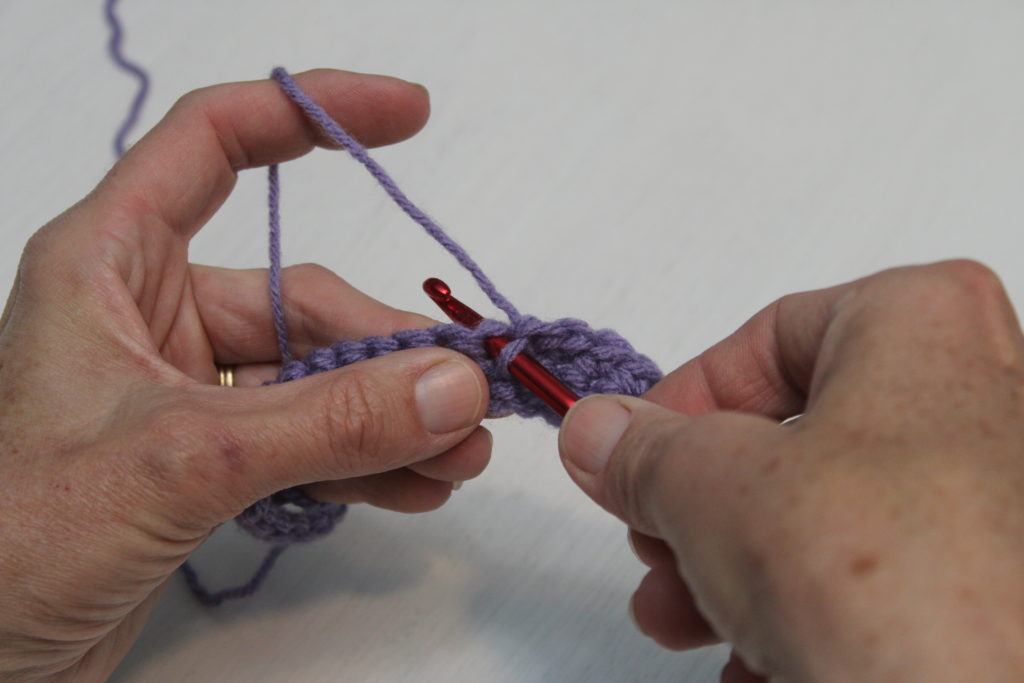
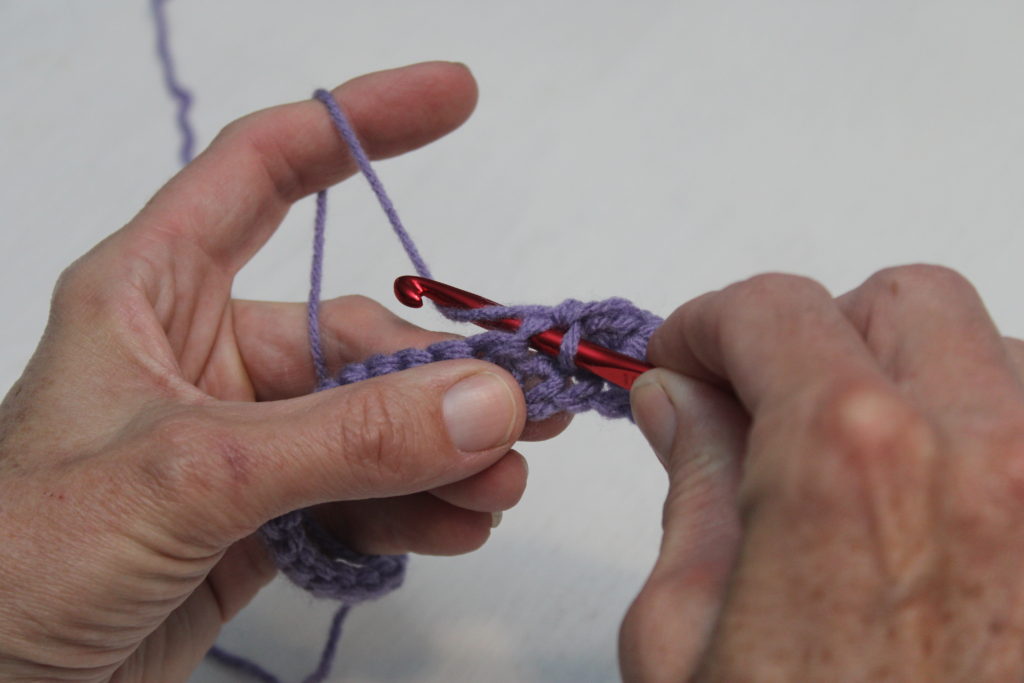
To make the half double crochet:
- Yarn over the hook (or wrap the yarn around the hook)
- Insert into the third chain from the hook.
- Yarn over again and pull through the fabric or work. You will now have 3 loops on the hook.
- Yarn over and pull the yarn through all 3 loops on the hook.

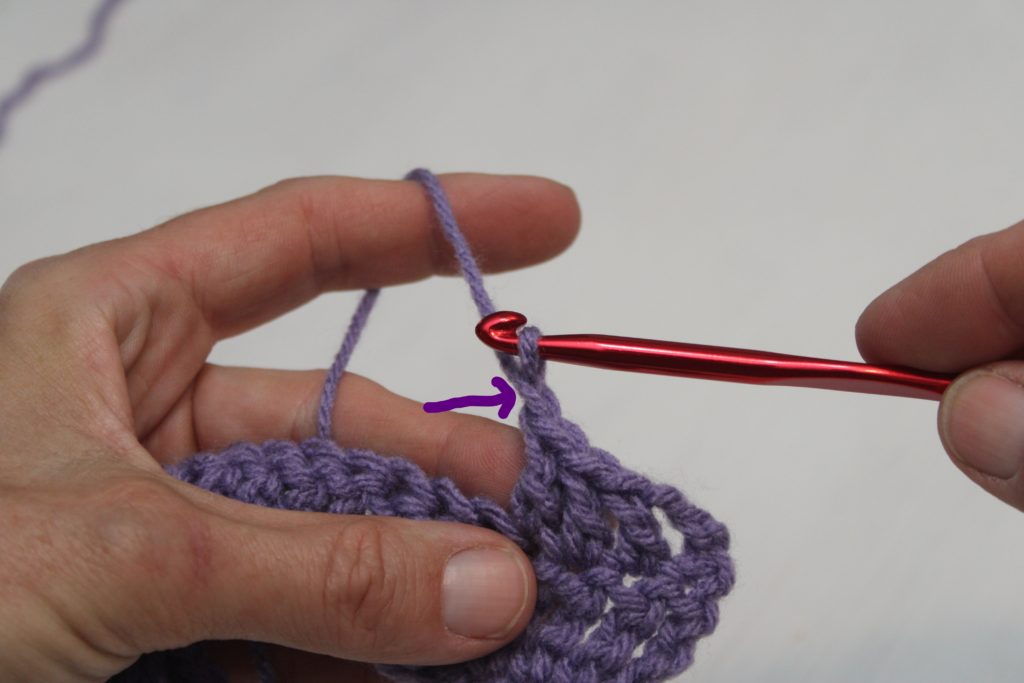
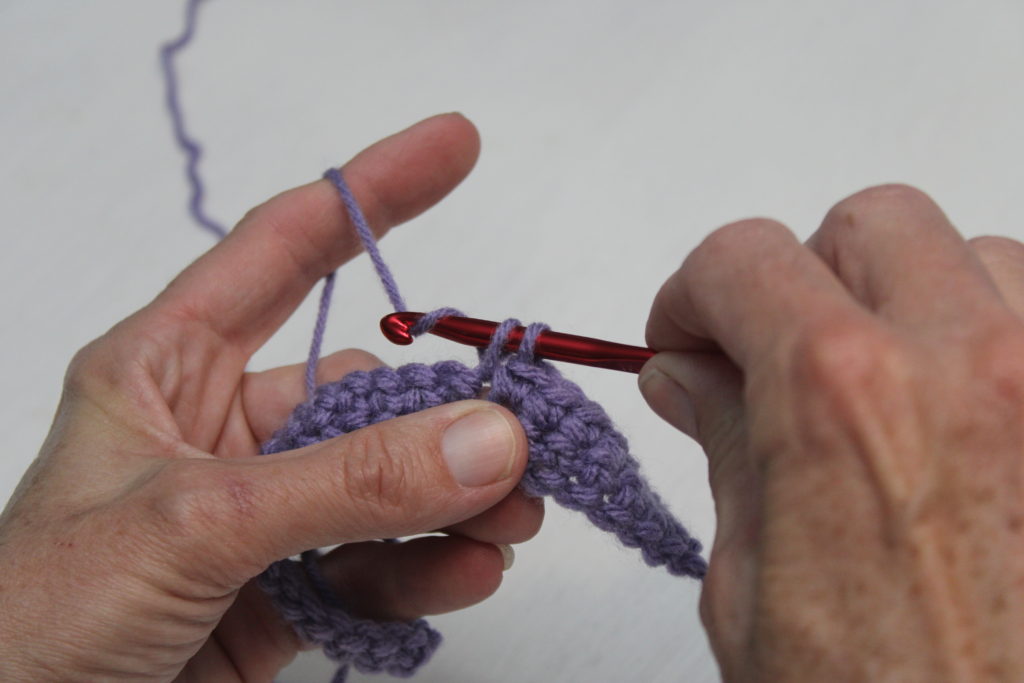
Continue with these steps across each chain of the foundation chain. You have now created your first row of half double crochet (hdc) stitches and are ready to turn your work. Once you have turned your work, chain 2 and you are ready to begin the second row.
I am so proud of you! So, keeping going to learn the rest of the basic stitches.
the half double crochet video tutorial
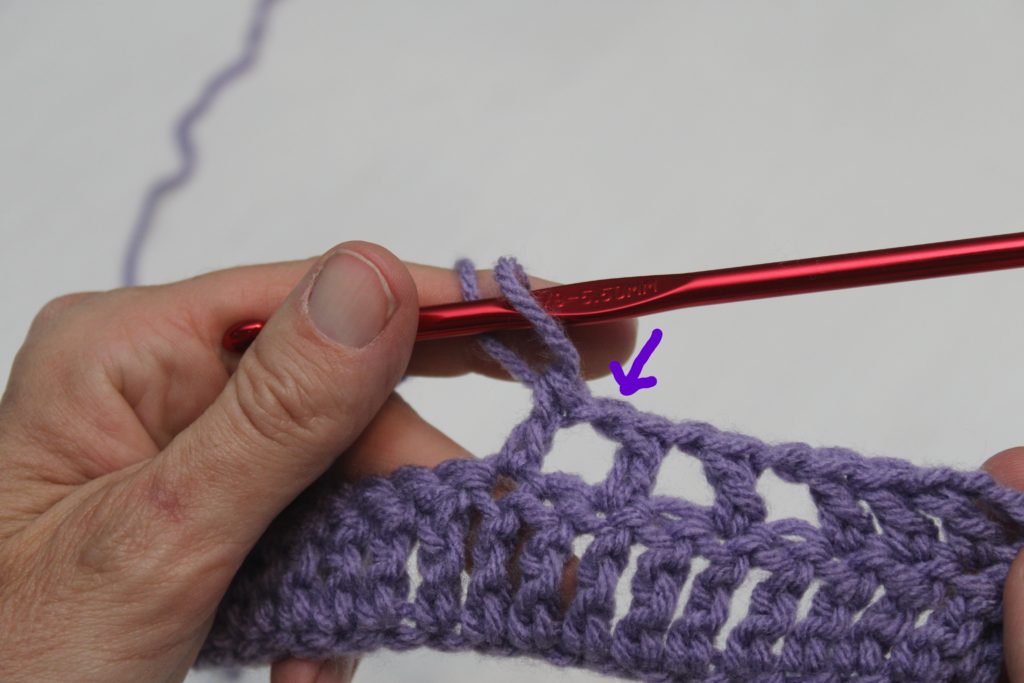
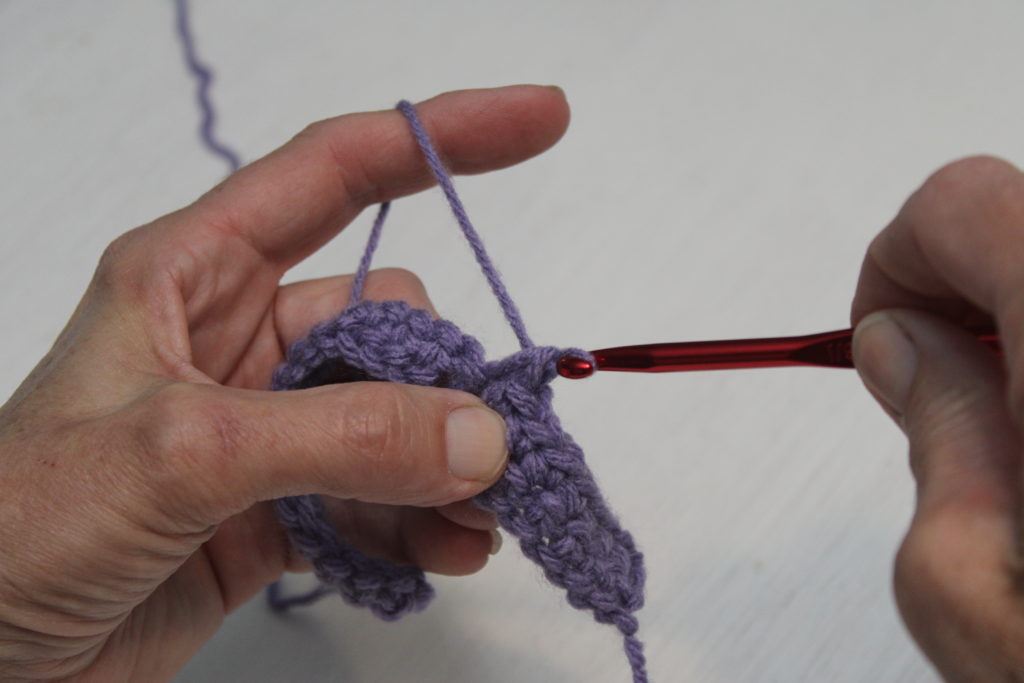
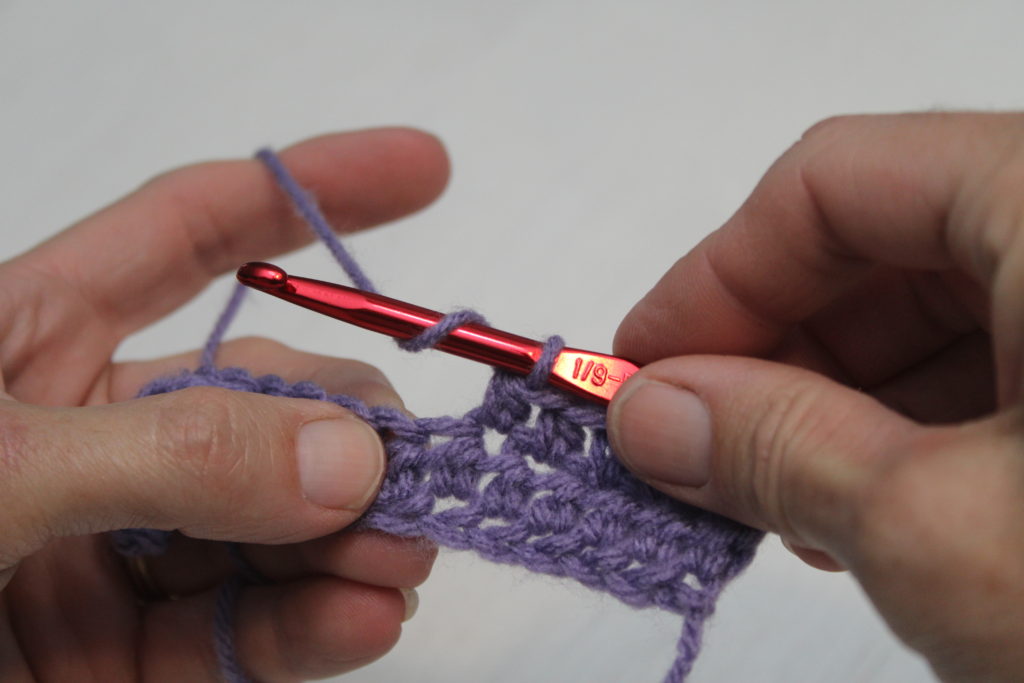
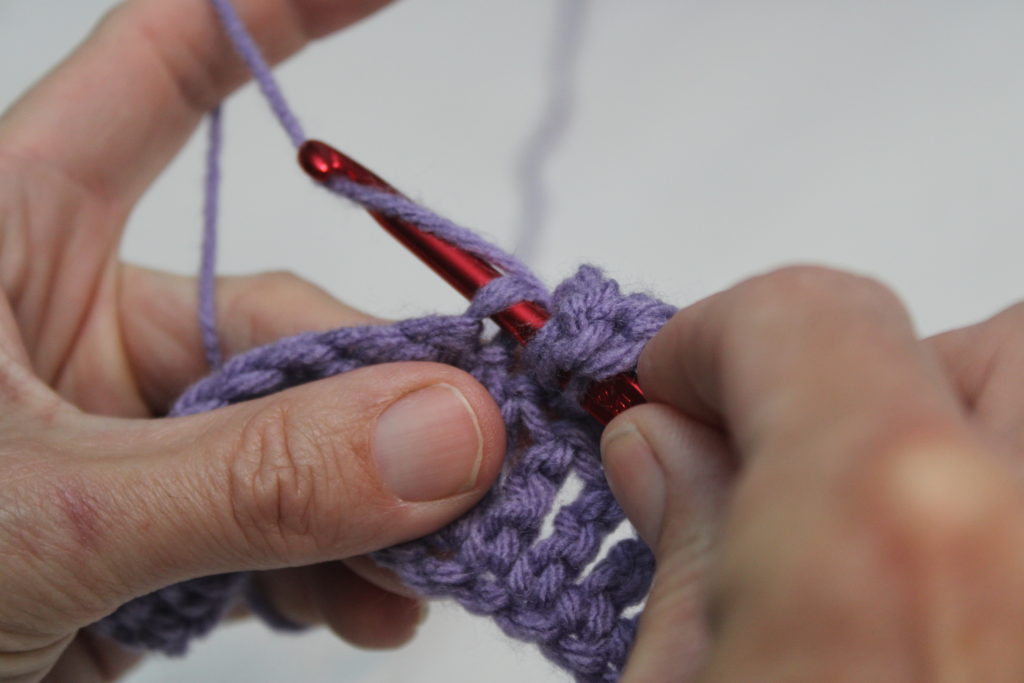
How to crochet the Double Crochet Stitch
In addition to the four stitches we have just discussed, the double crochet stitch is the next of the six essential stitches. Combine this stitch with other stitches to create lacy fabrics and designs. But by itself, it creates a taller fabric that is also a unique fabric. Similarly, it is a great stitch to use in scarves, hats, and blankets.
To make the double crochet stitch (abbreviated DC):
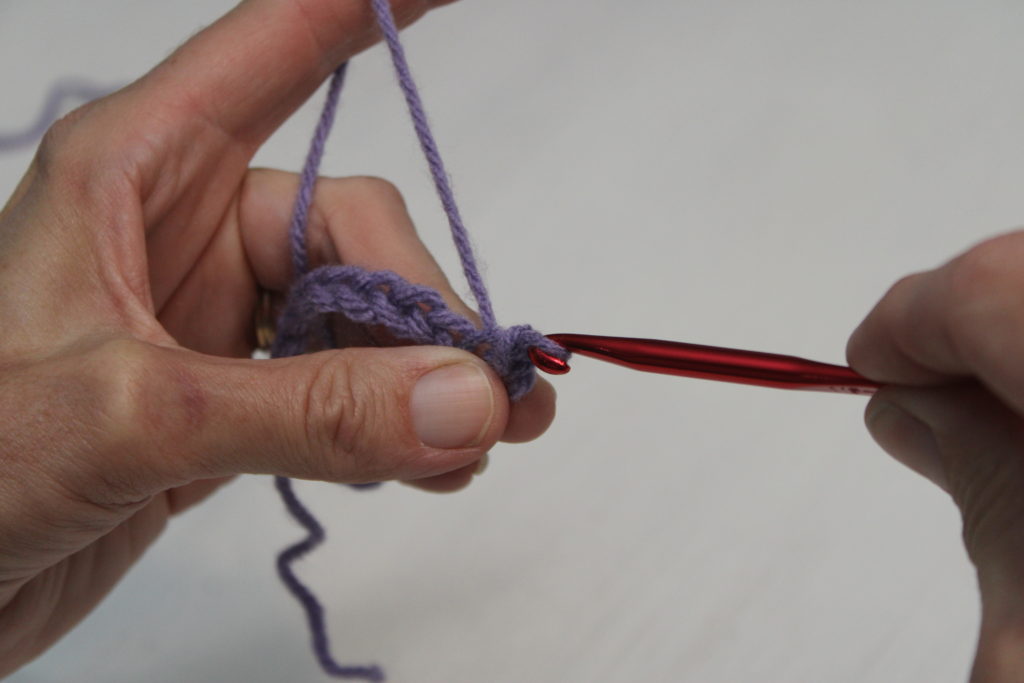
- Yarn over the hook and insert into the 4th chain from the hook.
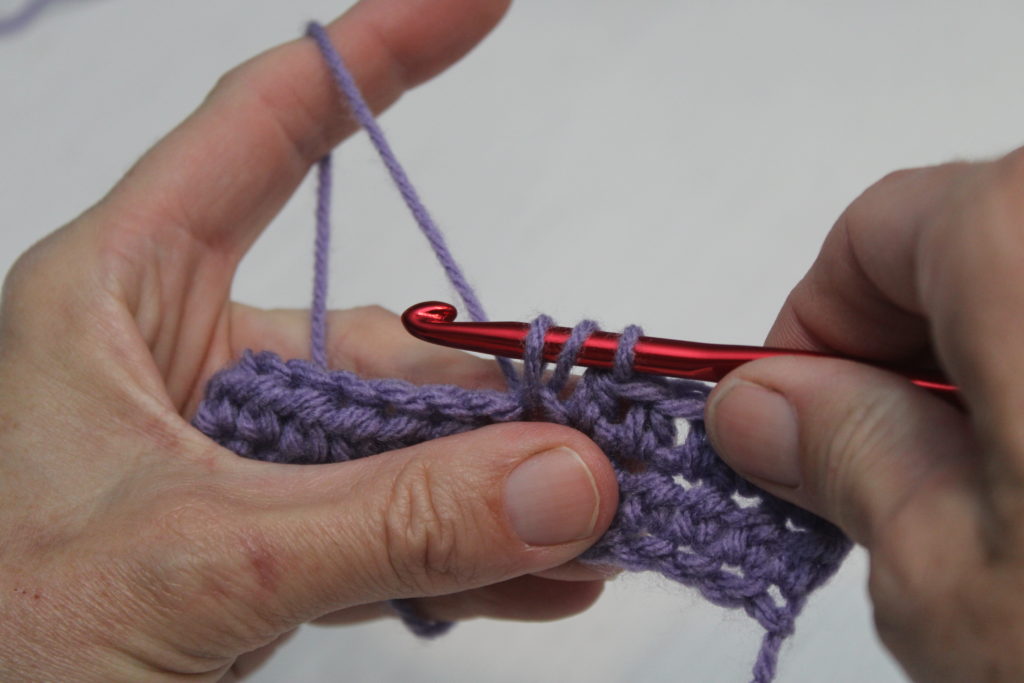
- Yarn over (or wrap the yarn around the hook) and pull a loop through the fabric. You will now have 3 loops on the hook.
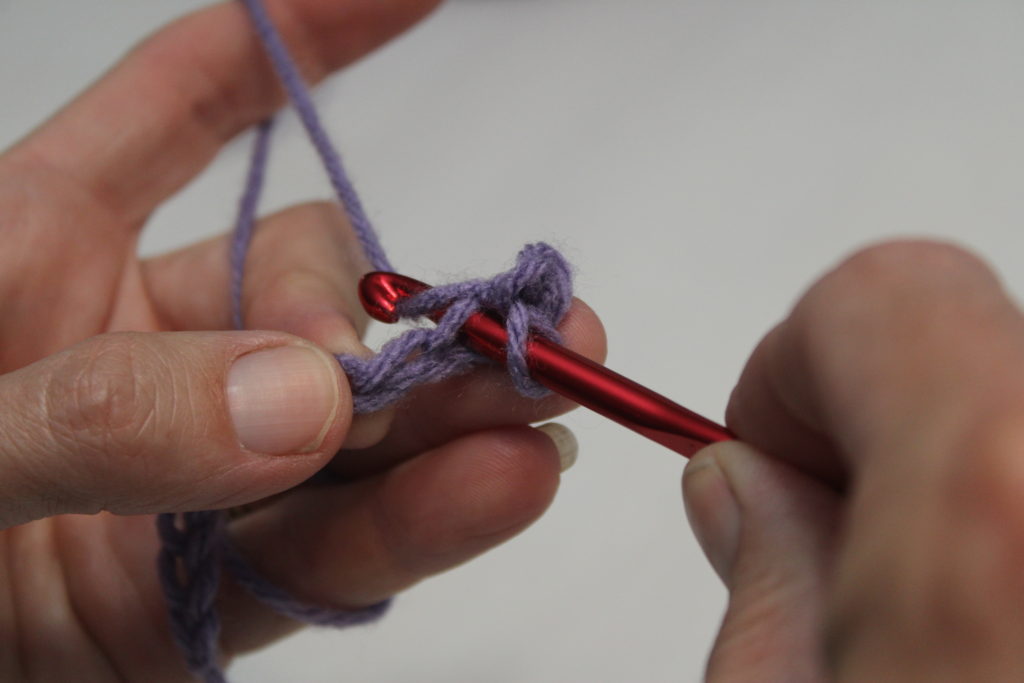
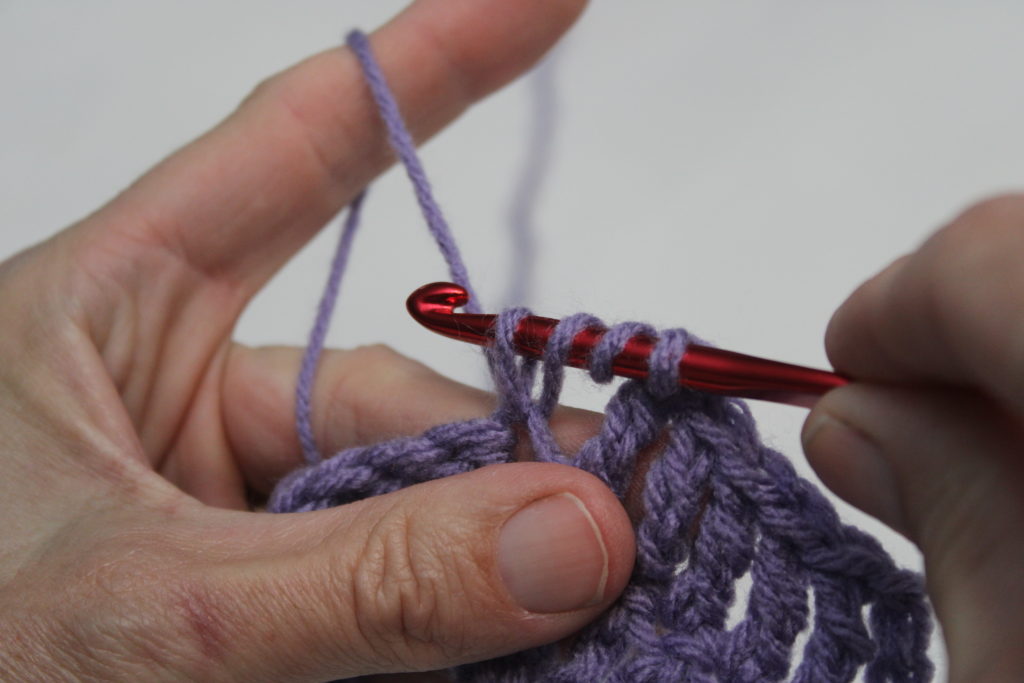
- Yarn over again and pull through only 2 of the loops. You will still have 2 loops on the hook.
- Yarn over the hook one last time and pull through the remaining two loops on the hook.
You now have made your first double crochet.
Double Corchet video tutorial
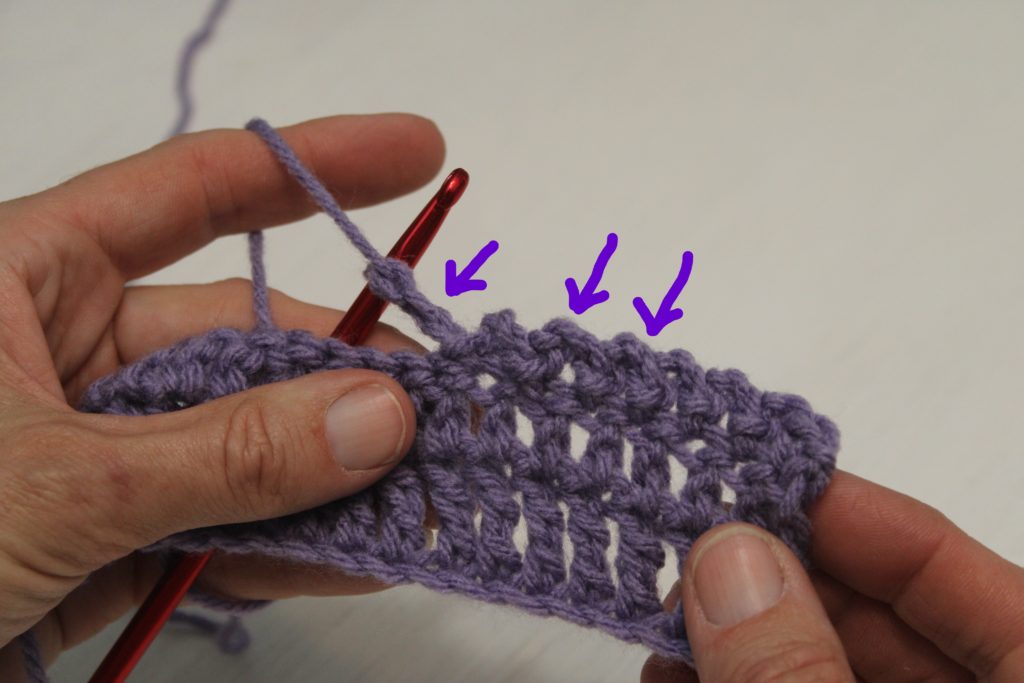
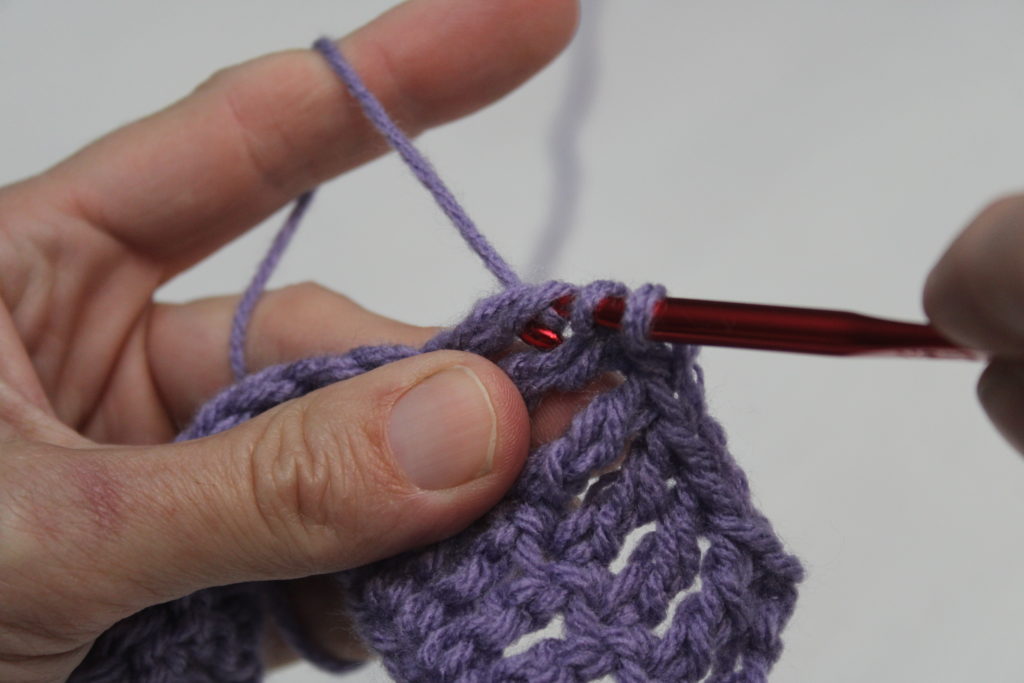
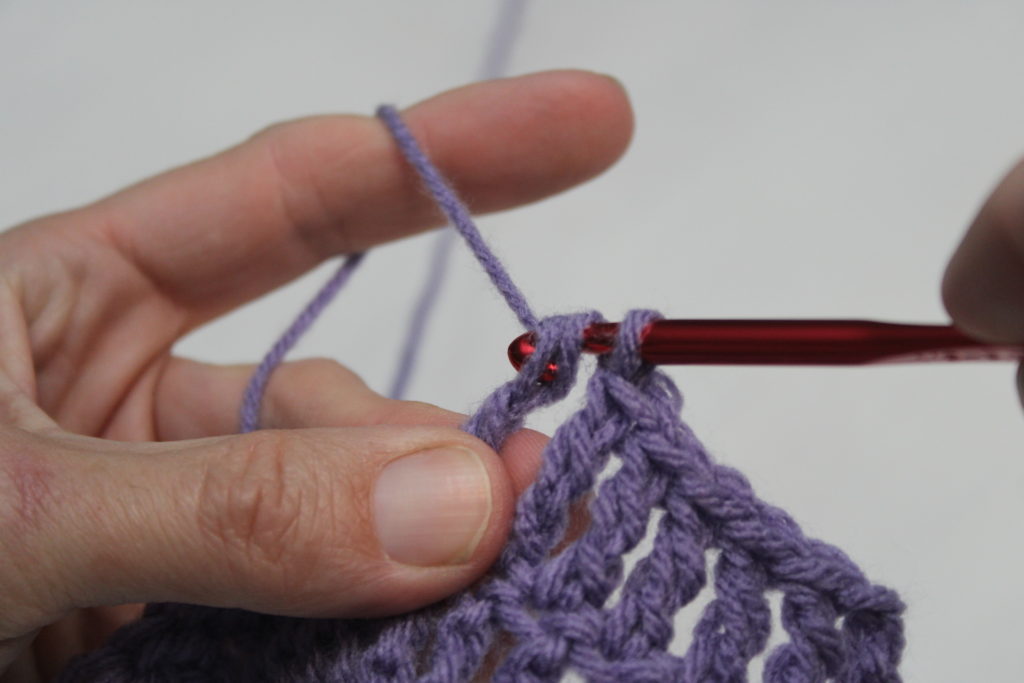
Repeat these same stitches in each chain across. You will now have one row of double crochets. Turn your work, and chain 3. Once again, you are now ready to begin row two.
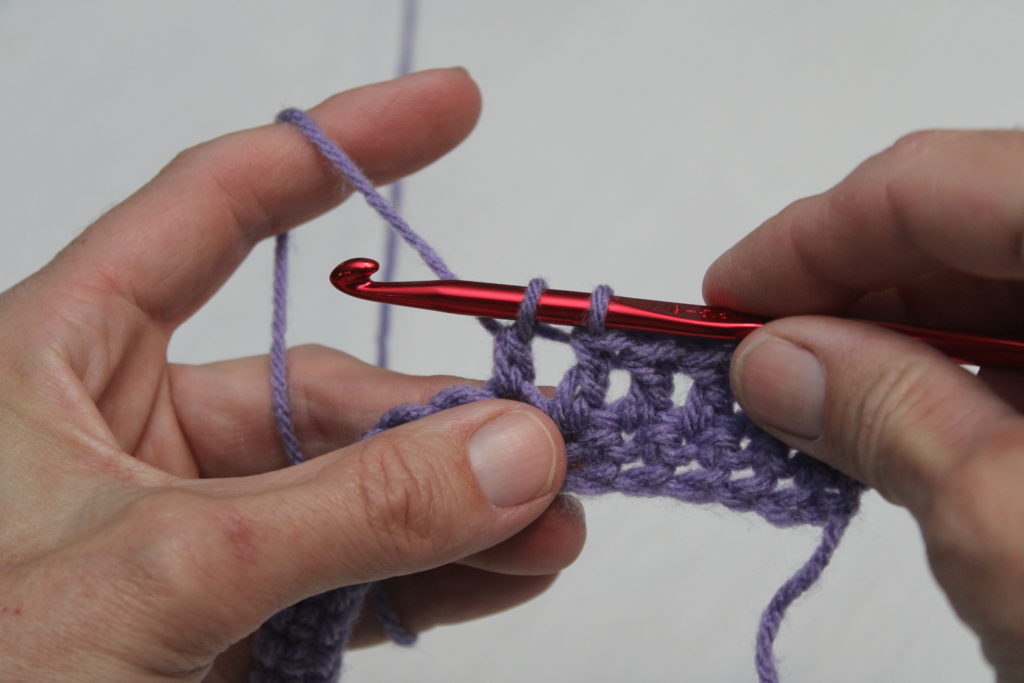
How to crochet the Treble Crochet Stitch
Finally, the last stitch of the six essential stitches you need to know is the treble crochet stitch (or triple stitch). The treble crochet is also the tallest of the basic stitches and abbreviated TR. However, this stitch is the least stable of all the basic stitches and creates a very loose fabric. By yarning over even more times, you can create the double-treble ad triple treble stitches. Use this stitch with other stitches to create countless designs and unique patterns. The treble crochet is another great stitch for hats, scarves, and blankets.
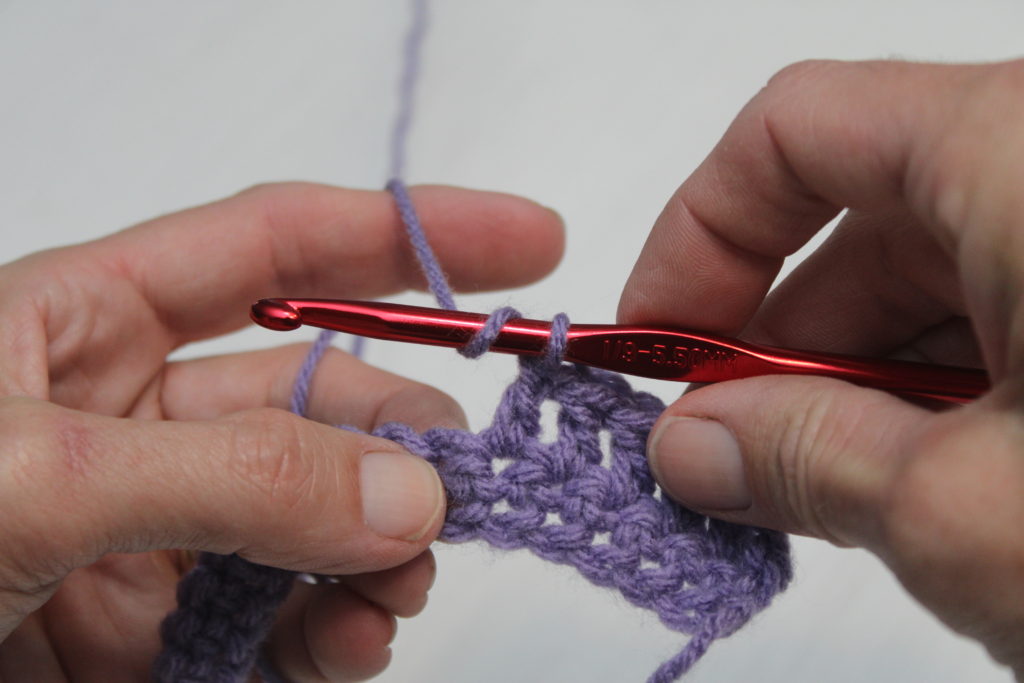
To make the treble crochet:
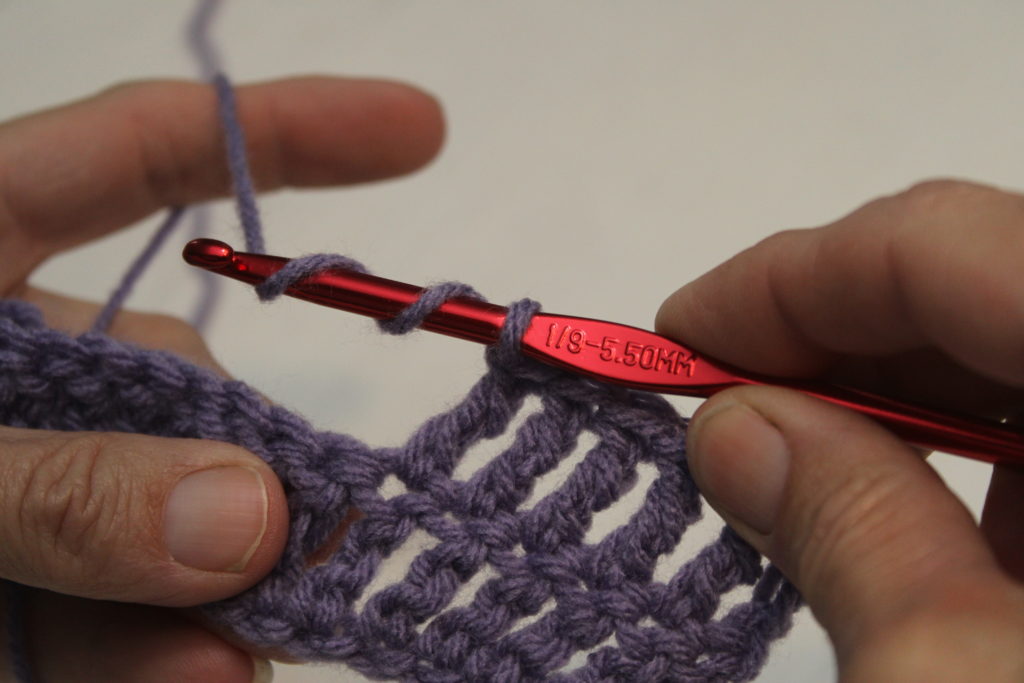
- Begin by yarning over twice. Insert your hook into the fifth chain from the hook.
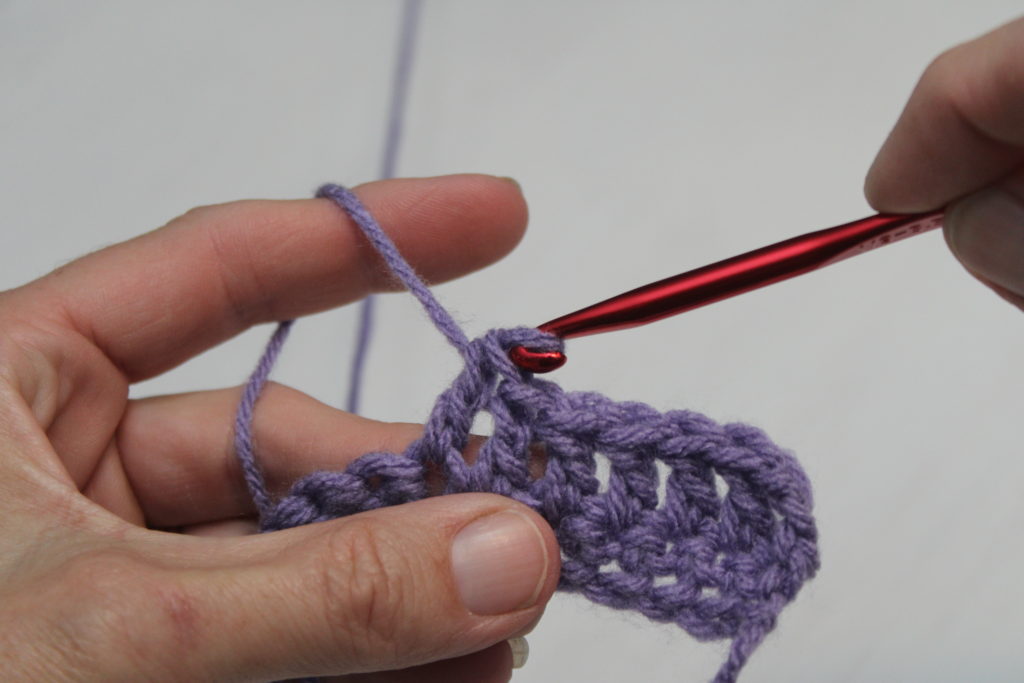
- Pull up a loop, you now have four loops on your hook.
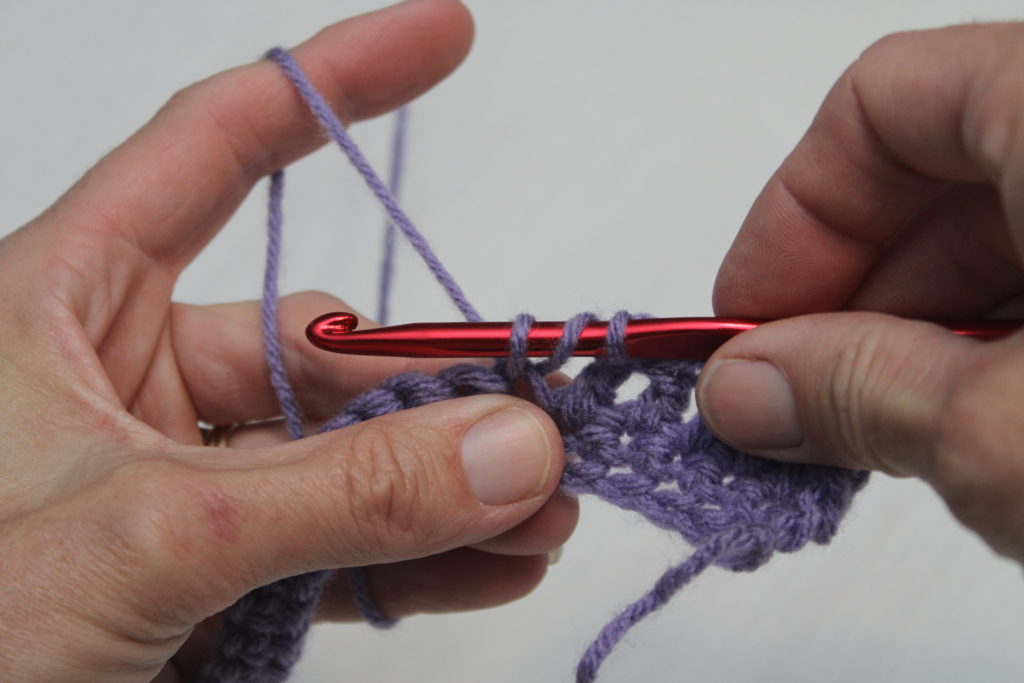
- Yarn over and pull through 2 loops.
- Again, Yarn over and pull through two more loops.
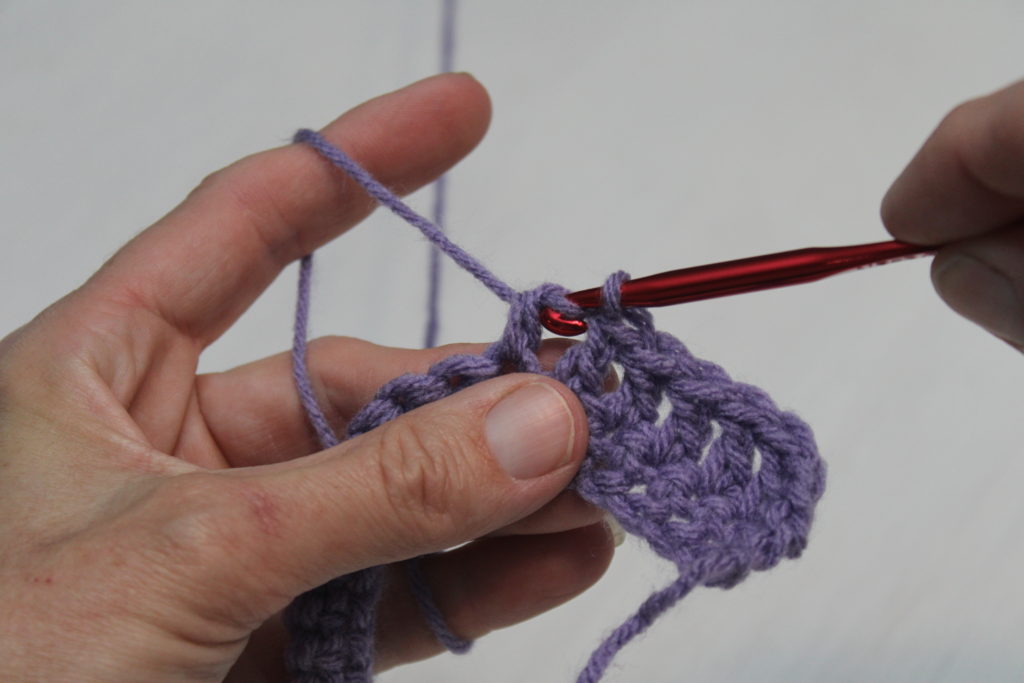
- Yarn over one more time and pull through the last two loops on your hook.
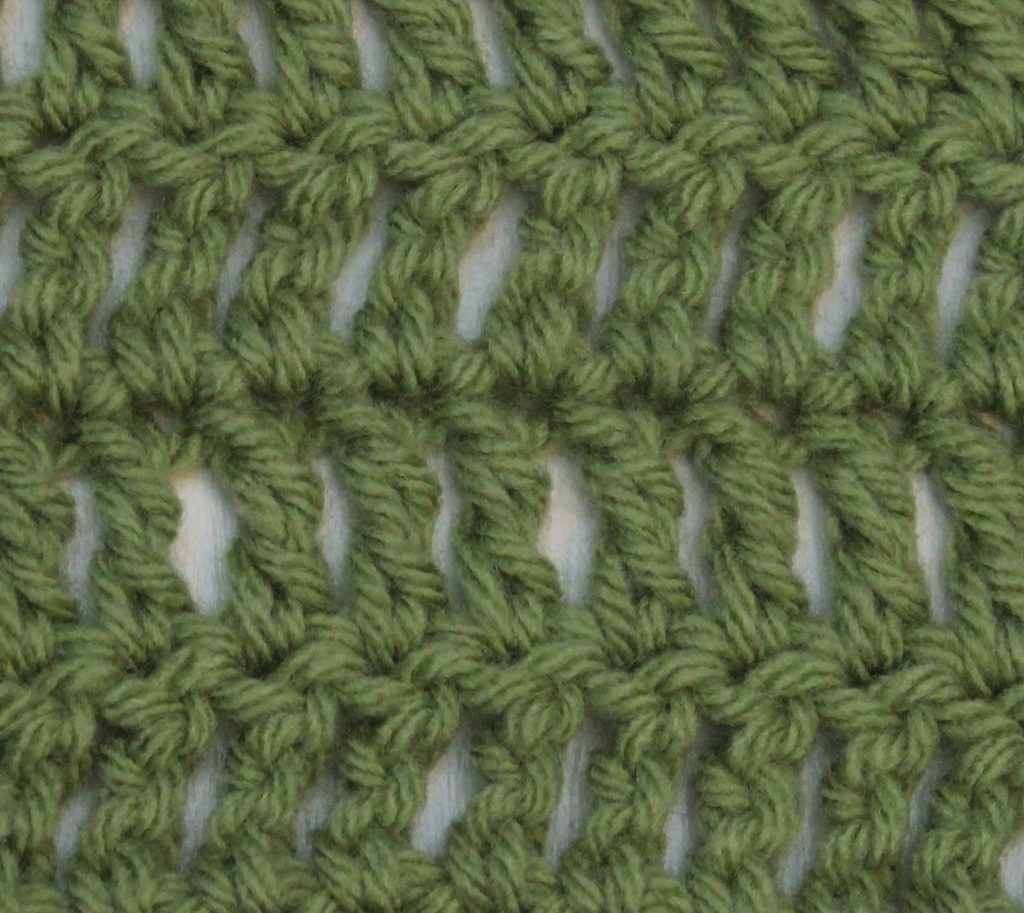
You now have completed the first treble crochet. The treble crochet creates a very loose fabric that drapes well. What can you think of to use the treble crochet for? Don’t be afraid to let you imagination go!
Your have completed your first treble crochet stitch. As before, you can move to the next chain and work the steps above again to create the second treble crochet stitch. Repeat these steps across your chains to finish the first row of treble crochets.
Treble Crochet video tutorial
More than just the 6 Essential crochet stitches
Now that you know all 6 of the essential crochet stitches, you are ready to learn even more crochet stitches. Furthermore, combine these 6 basic stitches in different ways and you created different stitches, patterns, textures, and designs.
In conclusion, one of the best things about crochet is that you can create lots of different stitches by simply combining the basic stitches in different ways. Therefore, it is endless what you can create! Whether you alternate basic stitches or group them together, you create stitches like the moss stitch, the cluster stitch, or the v-stitch. Each one creates its own unique texture and design. You can also alternate rows of stitches and have a completely different look to your project.
So what are you waiting for? Now grab a hook and some yarn and see what you can create. Be sure to check out my Stitch Library for more stitches to try and patterns using those stitches. Can’t wait to see you back.
One Comment